Using Maldet Anti Malware on Your Linux Server

Maldet Anti Malware

Introduction to Maldet

Strong security measures on your Linux server become increasingly vital because cyber threats persist and evolve. The open-source Linux Malware Detect (Maldet) is an effective solution for server administrators to protect their systems. Users widely choose the open-source Linux Malware Detect tool (Maldet) because it works well with Linux and cPanel server environments.


Maldet Anti Malware

Installation Process

Installing Maldet on your server involves a few simple steps. Visit the official repository to get maldetect using wget command: ‘http://www.rfxn.com/downloads/maldetect-current.tar.gz’ and follow it with ‘./install.sh’ command to initiate setup.

When installing, you may encounter two typical problems: permission errors and missing dependency requirements. To avoid these, ensure you have root or sudo access before proceeding. If you encounter dependency problems, updating your package manager and installing required libraries can resolve them. Official documents that show if updates need attention improve research effectiveness.

Once Maldet is installed, verify the installation by running `maldet –version` to ensure itโ€™s correctly set up. This command should return the current version number of Maldet, confirming that the installation was successful.

After installation, consider updating Maldetโ€™s signatures by executing `maldet -u` to ensure you are protected against the latest threats. You may also want to run an initial scan to check for any existing malware on your server using `maldet -a /path/to/directory.`

This procedure enables users to establish Maldet on their server to exploit its advanced malware detection capabilities.

Key Features of Maldet

Maldet’s malware detection capabilities are enhanced through multiple features. Real-time monitoring is a defining characteristic that lets Maldet always watch your server for irregular activities. The continued server monitoring through real-time surveillance enables quick detection and resolution of potential risks before any harmful events happen.

Maldet is a valuable security tool that helps users detect threats automatically. It equips users with automated scheduling options that enable server malware checks at programmed intervals. Regular automated scanning through Maldet protects your system from security threats that continue to appear between manual checks.

Maldet watches system operations and automatically reports security issues. The tool warns you through emails when malware emerges so you can take action before the issue becomes more significant. Maldet makes it easy for security experts to read reports about all detected threats and what the software did to stop them.

A critical functional aspect of the software enables automatic file isolation to prevent virus demonstrations. Through its isolation feature, Maldet defends your server environment against threats by discontinuing malware spread across your server network. The integrated quarantine function operates optimally with Maldet’s real-time activity monitoring and automated scanning capabilities to deliver complete security protection.

Maldet maintains resource-efficient operations as its final design feature. Our tool does not affect server performance, yet it perfectly handles limited system resources. Maldet runs efficiently, so organizations receive solid protection that does not burden their system operation.

Newsletter notifications protect Linux/cPanel server resources through automatic system enhancement, minimal resource utilization, and complete monitoring capabilities.

 

Maldet Anti Malware

Configuring Maldet for Optimal Performance

Removing inefficiencies in Maldet’s operation requires adjusting its settings to achieve peak operational efficiency. Start editing the configuration file at `/usr/local/maldetect/conf.maldet`. This file lets you modify settings to boost your server control functions.

First, create custom scan schedules to ensure your server is regularly checked for malware. Activity patterns can control the frequency and scope of server auditing runs. Additionally, specifying directories to include or exclude from scans can focus Maldet’s efforts where they are needed most, optimizing the detection process.

Email alerts should be enabled to stay notified about detected threats. Setting up these alerts within the configuration file lets you get instant alerts to respond quickly. The proactive alert system helps ensure security needs and prevents damage to our operations.

You can also set up Maldet to quarantine infected files automatically. The configuration file requires setup to activate this isolating feature that separates risky files to block malware from spreading across your system. System protection needs this principle because it helps stop risks better.

Maldet lets you use multiple security tools together after special setup steps. When Maldet operates with additional security tools, it enhances your complete security structure while building a robust defence plan. Maldet works well with other security systems because its design follows no set requirements for integration.

Check and upgrade your security configurations regularly to defend against fresh threats and changes in your server system. Regularly updating Maldet settings lets you use its top-level protection features properly. Adjusting its advanced settings can improve your server’s security and enhance Maldet’s performance.

Benefits of Using Maldet

Deploying Maldet, due to its security contribution, can benefit your server. The most valuable feature is that it lets you find and remove malware while defending your data against cyber threats. Maldet also adds new security functions to existing systems without needing extensive system changes.

To benefit from an active developer community, Maldet operates as an open-source tool that receives constant improvements from contributors and users. The interactive contributions of developers and users keep Maldet a dependable security tool that handles present and emerging cyber threats.

The way Maldet functions helps it use server resources without wasting power. Due to its efficiency, Maldet avoids slowing down server performance; hence, it remains ideal for systems with restricted resources. Your server’s proper functioning defends against threats while maintaining high performance and operational performance.

Maldet makes system security easier through its automatic scanning function. Maldet enables automatic server malware checks through scheduled scanning features, which do not need constant human supervision. The automated features of Maldet reduce total working time by guaranteeing continued security over extended periods.

The Maldet system sends organized threat reports that allow operators to deal with threats quickly. Maldet’s security features immediately respond to possible issues, strengthening server protection. Automated malware file quarantining by Maldet stops the propagation of harmful software, thus providing dual layers of protection.

Server administrators should recognize Maldet as a beneficial tool that helps improve server security measures.


Maldet Anti Malware

Comparing Maldet with Other Security Tools

Maldet positions itself uniquely compared to other security tools through its dedicated target of Linux and cPanel platform detection. Maldet focuses on delivering top Linux and cPanel protection because its tools are designed to run effectively on these platforms. The Maldet system uses its special creation to discover and protect against security threats that primarily target Linux web servers.

Maldet functions with the best possible resource usage, which makes it highly valuable. However, server performance and system resource consumption are negatively affected because many tools for malware detection demand significant processing capabilities. Due to its light burden on your server, Maldet runs well in performance-sensitive system environments.

Thanks to its real-time monitoring feature, Maldet stays in full security mode. This capability distinguishes it from other security tools because the system automatically detects and removes threats during active operation.

Since Maldet is an open-source program, its development process becomes more transparent for the community. This means that users benefit from continuous updates and improvements a global community contributes, which is not always valid with proprietary software.

With automatic scanning and detailed reporting, Maldet provides better convenience options than any other security tool available. It eases server administration by automatically watching for threats and creating thorough reports so managers can focus on other important tasks.

 

Maldet Anti Malware

Conclusion

Implementing Maldet within your server defence structure creates an advanced system to counter emerging threats in cyberspace. Through automatic monitoring and scanning, Maldet eases regular manual workloads, allowing IT staff to address high-priority tasks. Maldet’s reporting tools and alert system can immediately find threats to lower the chance of system damage.

Maldet runs with low resource needs while providing top-tier security measures. Since it stays open-source, it receives regular security updates that ensure it defends against new threats. Acquiring Maldet for your Linux/cPanel server improves your security readiness and enables trustworthy malware protection.

VestaCP: A Detailed Guide to Its Features and Setup

VestaCP A Detailed Guide

Introduction to VestaCP

Open-source web hosting control panel VestaCP makes it easy for users to manage their server tasks. Users can operate web hosting services with domains and manage email accounts and databases through its simplified interface. The user-friendly interface of VestaCP makes server management tasks available to users without extensive technical knowledge.

Users can select different Linux distributions, including CentOS, Ubuntu and Debian, through the platform for varied server setups. The VestaCP design operates with minimal system resources and stays lightweight thus safeguarding server performance.

Through its well-arranged dashboard, VestaCP enables users to swiftly reach vital server management capabilities. Through VestaCP, users can effortlessly navigate the interface to handle their websites and services without encountering typical interface complexity. Users access server management tools to run testing for performance monitoring and build backup schemes as well as account administration which raises platform effectiveness.

Users can personalize VestaCP functions by installing multiple available plugins and modules. Users need to understand both positive performance and user-friendliness together with official support limitations before proceeding.

Upholding both smooth server administration and optimized performance and user flexibility VestaCP provides an appealing system solution.


VestaCP A Detailed Guide

Advantages of Using VestaCP

Multiple benefits from VestaCP serve both users who require simple server management systems. The intuitive control panel design provides an easy-to-use interface which enables users to reduce website and server application management duration. Users with different levels of technical knowledge can access the platform because of its straightforward presentation design, which minimizes learning time.

The system resource management of VestaCP functions with excellent efficiency. Unlike many other control panels that can be resource-intensive, VestaCP operates smoothly, even on servers with limited resources. Server performance stays optimal due to the lightweight implementation, which benefits systems operating with minimal resources or smaller installations.

The server control panel VestaCP functions with multiple Linux distributions such as CentOS, Ubuntu, and Debian since its design offers users system compatibility flexibility. The broad base of operating system support ensures users can select a system that suits their specific needs or preferences.

The control panel implements monitoring tools directly inside its interface to provide server performance insight. Users obtain advantages from such tools because they both detect server issues beforehand and boost the performance of server health.

Users can modify VestaCP using the feature that offers enhanced expandability options. VestaCP users gain control panel capabilities through its ability to support plugin and module installation functionalities. Users can adapt solution features because it supports varied server management requirements.

The VestaCP development uses a community-based approach to provide users access to multiple collective resources and vast knowledge base. Components of the active forum enable users to share ideas, solve stay cu, and start practices.

Disadvantages of VestaCP

There exists numerous benefits in VestaCP yet some particular drawbacks also exist. A significant issue is its limited official support. Although community forums can be helpful, they do not replace the reliability of dedicated support services. The builder faces a substantial challenge when dealing with complicated problems that require professional expertise.

Another concern is security. Implementing outdated components in various VestaCP modules receives criticism because this practice could enable security vulnerabilities in the system.

Users need to pay attention to both the updating procedures and installation safety protocols to minimize security risks. System security weaknesses become more susceptible to attacks whenever crucial maintenance practices are not performed correctly.

Additionally, while straightforward, VestaCP’s user interface may lack some advanced features that more experienced administrators might expect. Although beneficial for beginners, this simplicity might not meet the needs of those managing larger or more complex server environments.

Compatibility challenges appear mostly when working with current Linux distributions and customized server environments. Users might find that certain features do not work as expected or require additional tweaking to function correctly.

Lastly, while VestaCP is extensible through plugins and modules, the selection of available extensions is limited compared to commercial alternatives. This can restrict the ability to fully customize the control panel to suit specific needs.

Multiple drawbacks show why VestaCP would not be suitable for users who need extensive technical assistance or powerful functionality and heightened protection.


VestaCP A Detailed Guide

Installation Process of VestaCP

The installation process needs you to verify that your system fulfills mandatory requirements at its beginning. Users can operate VestaCP with CentOS or Ubuntu Linux distributions and also Debian. Your server should have 1 GB of RAM memory together with 20 GB of disk space and an unmodified new operating system.

To begin, log into your server via SSH as the root user. First, download the VestaCP installation script using the following command:

curl -O http://vestacp.com/pub/vst-install.sh

After downloading, initiate the installation process with the following:

After being prompted, you need to submit your email address and the domain name you want to use. Finish the installation process by carefully following the directions and prompts.

During installation, ensure that your firewall settings do not block essential ports. VestaCP typically uses port 8083 for the control panel and ports 25, 587, and 465 for email services. Adjust your firewall settings according to your needs to prevent access problems.

After installation, access the VestaCP control panel by navigating to your server’s IP address, followed by port 8083 (e.g., `https://your-server-ip:8083`). Use the login credentials created during installation to access the dashboard.

It’s a good practice to perform a security audit after installation. Check for available updates and apply them promptly to minimize vulnerabilities. Check your DNS configuration to guarantee smooth domain resolution while reviewing all your settings.

If you encounter any issues during the installation, refer to the VestaCP community forum and documentation for troubleshooting tips and support from other users who may have faced similar challenges.

Common Issues and Troubleshooting

Users may face several common issues while using VestaCP. DNS configuration errors occur frequently to disrupt the process of domain resolution. Your DNS settings must match those your domain registrar has given you to prevent these kinds of problems.

Access problems with the control panel are another typical concern. Review your firewall settings if you cannot log in or if the panel seems unreachable. Ensure that the ports, such as 8083 for the control panel and 25, 587, and 465 for email services, are not blocked.

Users who use VestaCP sometimes face difficulties because their software components are outdated. Using older modules by VestaCP in certain areas creates security concerns for users who complain about it. Regularly check for updates and apply them promptly to mitigate these risks.

Server setups and newer Linux distributions may not operate well with this SQL application.If you notice that particular features aren’t working as expected, you might need to make additional configurations or tweaks.

Configuration errors can result in undelivered emails or authentication problems for email services. Verify that your email settings are correctly configured and that essential ports are open.

Delayed system performance becomes a common problem when servers function with limited resources. While VestaCP is designed to be lightweight, it’s crucial to monitor your server’s resource usage regularly. Utilize VestaCP’s built-in monitoring tools to keep track of performance metrics and identify potential bottlenecks early.

When problems arise, users can find solutions by consulting either the VestaCP Community forum or the online documentation platform. Through the community, you can search for different problem resolutions while users assist with issues they have already addressed. Community-developed resources help significantly to address problems correctly.

Lastly, a thorough security audit should always be performed after installation. Regularly update your system and review your firewall and DNS settings to ensure they are correctly configured, minimizing potential vulnerabilities.


VestaCP A Detailed Guide

Conclusion and Final Thoughts

The VestaCP features unify three main characteristics: a friendly user interface alongside adaptable elements and rapid operational performance. Users of all levels benefit from the interface, which helps them execute server management operations with ease.

Users benefit from a resource-lightweight operation when running the control panel on servers with minimal requirements which serves small setups alongside resource-saving users.

The platform presents various drawbacks because of its architectural design. Users face difficulties because HiveHoppers lacks specific support services, which becomes problematic when complex problems appear beyond user capabilities. Product updates need immediate attention due to neglected components and possible security risks, which users must address actively.

Users can customize VestaCP effectively using its plugin and module frameworks despite encountering difficulties. People can adjust the control panel to fit their server needs due to its flexible nature. Users find the active community forum beneficial because they can retrieve collective information and support from their peers.

People who learn the system correctly and keep up-to-date with updates can find VestaCP an economical management solution. Its open-source structure and community-based development maintenance make it a more substantial choice than paid control panels.

Web service management benefits from VestaCP which provides both performance customization along with practicality functions yet avoids supporting official assistance or extra functionality. Users who combine community resources alongside security practice awareness enable effective server management on the open-source platform.

301 vs 302: Unlocking the Power of Redirection

Unlocking the Power of Redirection

Introduction to URL Redirection

Web management in the digital era depends heavily on efficient user and search engine redirection techniques. URL redirection methods can efficiently redirect web users and search engine crawlers.

Web organizations deploy this method during site maintenance and rebranding operations and when content needs to be relocated. Properly executed redirections can prevent users from encountering error pages and help maintain seamless site navigation.

There are various situations where redirection becomes essential. For instance, if you’re transitioning to a new domain, redirection ensures that your existing traffic and SEO value are transferred to the new address. After content changes or deletions, redirection serves two functions: it directs users to appropriate updated pages that improve their experience and protects your search engine rankings.

Understanding the different types of redirections, such as 301, 302, 307, and 308, allows you to choose the best method for each scenario. The various types of links provide separate functions that create separate effects on user interaction while affecting SEO performance in distinctive ways. The selection of the appropriate redirect type depends on whether the change is permanent or temporary and whether you need to maintain the original request methods.

Implementing redirects correctly involves configuring server-side rules to handle these changes efficiently. The system tackles website performance issues caused by redirect loops and stops operational delays.

Aside from initial setup, effective redirection management also requires continuing assessment to guarantee proper functioning. Websites that learn how to redirect URLs achieve better content and structure management, which leads to pleased search engine activities and content visibility to users.


Unlocking the Power of Redirection

Understanding 301 Redirects

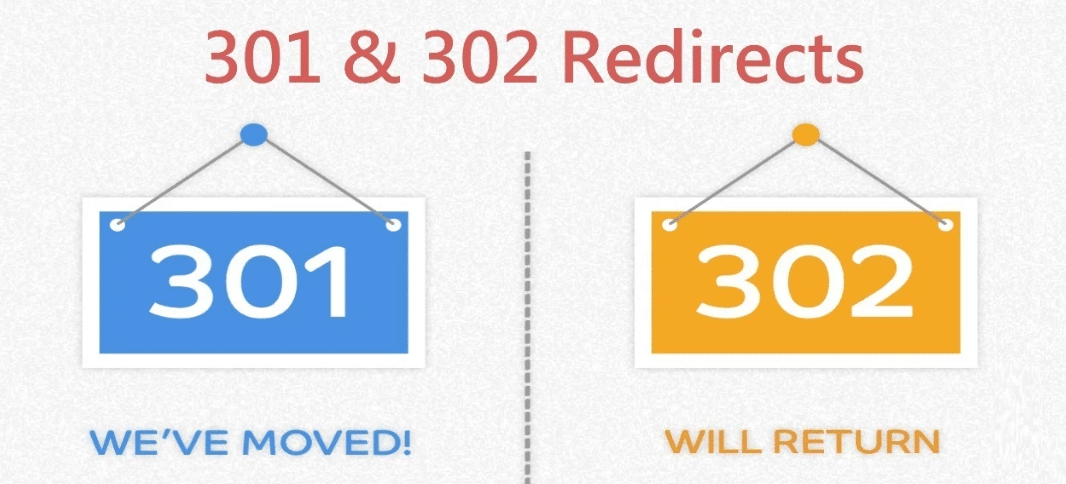
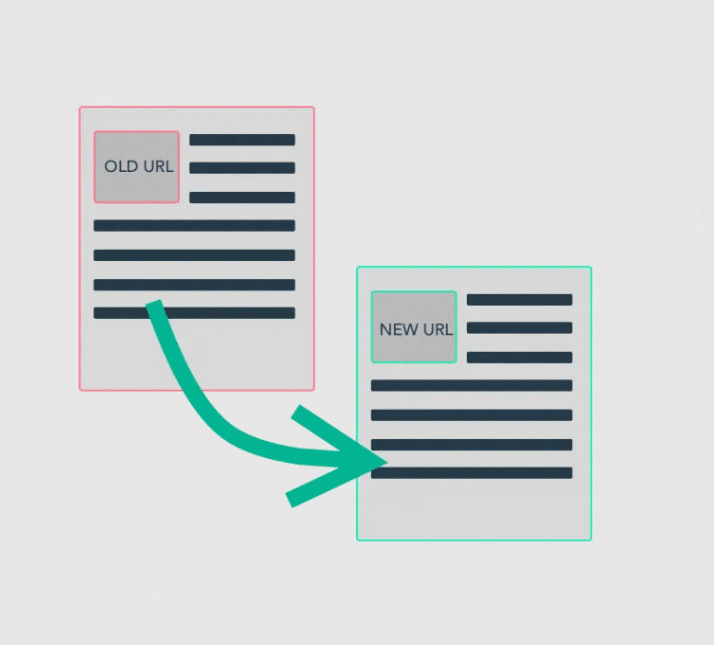
A 301 redirect is a powerful tool for maintaining search engine rankings when URLs change. It works by permanently guiding visitors and search engines from the old URL to a new one.

Ranking power shifts from the obsolete page to the new page through the redirection system to sustain search result visibility. Typical uses for a 301 redirect include moving your site to a new domain, consolidating duplicate content, or directing users to a more relevant or updated page.

Setting up a 301 redirect involves configuring server-side rules to handle the transition seamlessly. Through the redirection system, ranking power shifts from the obsolete page to the new page to sustain search result visibility. Search engines gain advantages due to their capability to rapidly index new URLs, which maintains content accessibility and prevents a loss of search ranking.

A typical scenario for employing a 301 redirect is during a site migration. Whether rebranding or changing your site’s structure, a 301 redirect can efficiently transfer your existing traffic and SEO value to the new domain. Another situation is that multiple pages with similar content merge into one authoritative page. Updating content on one page elects to render duplicate content issues while concentrating all search engine signals toward the same updated page.

URL management and search engine performance improvement are possible through properly implementing 301 redirects at the right times. Correct deployment of redirects points users and search engines to proper pages, thus sustaining your website’s independence and online representation.


Unlocking the Power of Redirection

Exploring 302 Redirects

A 302 redirect serves as a temporary measure, guiding users and search engines to a different URL with the expectation that the original page will be restored. Unlike a 301 redirect, a 302 does not transfer SEO value to the new location, making it suitable for short-term changes.

Common scenarios for using a 302 redirect include A/B testing of content, where you want to compare performance between two-page versions without impacting SEO rankings. Redirection proves helpful in redirecting web pages for updates and maintenance sessions so visitors end up on working content instead.

Another situation that benefits from a 302 redirect is when a specific page is temporarily unavailable due to seasonal changes or limited-time offers. For instance, an online retailer might use a 302 redirect to guide users to a similar product page when the original item is out of stock, planning to revert to the original URL once the product is available again.

While implementing a 302 redirect, it’s crucial to configure server-side rules correctly to avoid unintentional SEO consequences. Regularly monitor the redirected pages to ensure they are functioning as intended and that users are being directed appropriately. Using a 302 redirect thoughtfully helps manage temporary changes without disrupting your website’s overall structure and performance.

Other Redirect Types

Other options exist beyond the widely used 301 and 302 redirects, like 307 and 308. A 307 redirect is a temporary measure while keeping the HTTP method intact. The response technique provides valuable benefits when maintaining original request methods takes priority. In contrast, a 308 redirect functions similarly to a 301 but retains the HTTP method and request body, making it ideal for both permanency and method preservation.

In particular instances, these one-of-a-kind connections assume essential operational functions. For example, if a form submission process needs to be temporarily redirected but the method should remain unchanged, a 307 redirect is the appropriate choice.

Meanwhile, a 308 redirect is valuable when permanently moving a resource while ensuring that any post data or other HTTP method specifics are not altered.

Web managers who understand additional HTTP redirect types gain the ability to handle complicated scenarios that warrant keeping essential elements from the initial requests. Using the correct type of redirect ensures that users and search engines are correctly guided without unintended consequences.


Unlocking the Power of Redirection

Implementing Redirects Correctly

Setting up redirects properly involves configuring your server to handle these changes efficiently. Your redirects must occur on the server side to prevent a negative user experience through delayed loading times.

A total update of internal URLs through new addresses stops broken link encounters and redirect chain problems for site visitors. Redirect chains, where one redirect leads to another, should be minimized as they can slow down your site and frustrate visitors.

Additionally, take the time to update any backlinks pointing to old URLs. When you keep backlinks up to date, your site’s credibility and search engine optimization performance begin to degrade. Tools like Google Search Console can help identify which external links need updating.

When implementing redirects, be mindful of the specific needs of each type. For instance, a 301 redirect is ideal for permanent changes, while a 302 redirect is better suited for temporary adjustments. Understanding these differentiating characteristics will help you select suitable redirects for each situation.

Finally, regularly monitor your redirects to confirm they are functioning correctly. Users can resolve website problems efficiently by using Ahrefs or Screaming Frog tools to identify problems. Regular tests help maintain site navigation and user and search engine access to the intended content so readers can access it without interruptions.

Monitoring and Testing Redirects

Monitoring and testing your redirects is crucial to ensure they function as intended. Utilize tools such as Google Search Console, Screaming Frog, and Ahrefs to identify any issues. Tool systems identify broken links, chains of redirects, and other possible problems that impact user experience and influence SEO performance.

Routine audits quickly identify 404 errors and redirect issues, enabling you to resolve the mistakes while redirecting users and search engines to the correct destinations. It’s also essential to test redirects after any significant site updates or changes to confirm they work correctly. Regular maintenance activities sustain website efficiency and reliability.


Unlocking the Power of Redirection

Conclusion and Best Practices

Users must grasp redirection types at their core level to achieve optimal experience and SEO results. Choosing the appropriate redirect for each scenario is crucial, whether it involves a permanent change, like moving to a new domain, or a temporary adjustment, such as A/B testing content.

Consistently implement server-side redirects to ensure fast and reliable performance. Update all internal and external links to reflect new URLs, avoiding redirect chains that can slow down your site. Regularly monitor redirects using tools like Google Search Console, Screaming Frog, and Ahrefs to catch and fix issues promptly.

Incorporate a routine audit of your redirects into your site maintenance plan. After significant updates or structural changes, test redirects are used to confirm that they function correctly. The establishment of strategic testing lets you address potential issues before they happen, which impacts both user experience and engine rankings.

Your website efficiency and user-friendly UX will remain strong through best practice implementation of these measures.


A Simple Guide to Changing the URL on Your WordPress Site

Changing the URL on Your WordPress Site

Introduction to URL Change

Changing the URL of your WordPress site can initially seem intimidating, but it’s often necessary for various reasons. You might be rebranding, switching to a more memorable domain, or simply trying to make your URL more SEO-friendly. Correctly managing the URL change remains vital no matter what drives you to make this change because it protects your site functionality alongside its search engine discoverability. This guide will explain the next steps to achieving a successful transition to your new URL.


Changing the URL on Your WordPress Site

Preparing for the Change

Before you dive into changing the URL of your WordPress site, you need to make a few preparations. First, create a complete backup of your WordPress site. This includes all files and databases to provide a safety net if something goes wrong. The backup process simplifies through the use of plugins available as UpdraftPlus and BackupBuddy.

Your next step needs to include an evaluation of how SEO elements will be affected by your site changes. The modification of URLs affects search engine rankings therefore you need to establish redirect programs and update every link throughout this transformation phase. Screaming Frog enables you to detect all URLs that require updating throughout your site.

Team members along with stakeholders need to receive notice before proceeding with modifications. Such communication ensures a lack of misinterpretation preventing divergence in understanding throughout different parties. Create a comprehensive inventory of all locations that use the present URL to ensure appropriate updates after the URL transition.

You should also make a note of any custom code or hard-coded links that might be impacted by the URL change. Reviewing your theme files and any custom plugins for hard-coded URLs can save you a lot of troubleshooting time later on.

Lastly, if you have an SSL certificate installed on your current domain, ensure it will cover your new domain or plan to get a new one. Moving to a new URL often requires updating your SSL certificate to maintain a secure connection.

Taking these preparatory steps will help make changing your WordPress site’s URL as seamless as possible, setting you up for a successful transition.

Updating the URL in WordPress Settings

Access your WordPress dashboard and go to the Settings section. You’ll see fields labeled ‘WordPress Address (URL)’ and ‘Site Address (URL).’ Update these fields with your new URL and save the changes. This is an important step, as it informs WordPress of your new URL, ensuring that your site’s basic functionality is aligned with your new domain.

Once you’ve updated these settings, your site will use the new URL. However, this change alone won’t update other configurations or links within your site, so additional steps will be needed to ensure everything functions properly. Be prepared for a temporary period of inaccessibility if pending configurations need to be addressed.

Ensure you’ve updated all necessary elements, such as custom code and hard-coded links within your theme files or plugins. These may not automatically adjust to your new URL, potentially causing broken links or site errors. Use tools like Screaming Frog or search and replace plugins to help identify and update these instances.

If your site has an SSL certificate, check if it needs to be updated to match your new domain. This approach will maintain site security and visitors’ trusted status. Check all pages and features of your site to confirm that your WordPress settings changes successfully propagated after implementation.

Keep in mind that updating your URL in WordPress settings is a key part of the process, but it is not the only step. You will need to follow up with additional configurations to ensure that everything is in sync with your new URL.


Changing the URL on Your WordPress Site

Updating Database and Files

Updating your database and files is essential after modifying the URL in your WordPress settings. This ensures all references to your old URL are replaced, avoiding broken links and site errors. One efficient way to do this is using a plugin like Better Search Replace. This tool scans your database for any instances of the old URL and replaces them with the new one, streamlining the process.

If you prefer a more hands-on approach, you can manually update your database and files using phpMyAdmin. Access your database through phpMyAdmin, and search for tables containing the old URL. Replace these manually, making sure to cover all instances to prevent any issues.

Another crucial aspect is updating your media files and links within your content. Use a tool like Velvet Blues Update URLs to quickly update URLs in your posts, pages, and custom post types. This can save much time and effort compared to manually editing each piece of content.

If you have custom scripts or hard-coded URLs within your theme or plugins, these will also need to be updated. Open your theme and plugin files and perform a search-and-replace operation to update the URLs. Tools like Sublime Text or Atom can be handy for this task, allowing you to search multiple files simultaneously.

Don’t overlook your RSS feeds, which may reference the old URL. Update these manually or use a plugin to ensure your feed subscribers continue to receive your content without interruption.

Finally, check for any third-party services or APIs that interact with your site and update them with the new URL to maintain functionality.

Handling Redirects and Links

Proper redirects are vital when changing the URL of your WordPress site. Use a redirect plugin to create 301 redirects from your old URLs to the new ones. Users benefit from this redirect because it alerts search engines about permanent content relocation that maintains SEO rankings and guides visitors to appropriate webpage destinations.

Beyond setting up redirects, it’s essential to update any internal links within your site. These include links within your posts, pages, menus, and widgets. Use a search-and-replace plugin or tool to streamline this process and avoid missing links.

For external links, reach out to site owners who link to your old URL and request updates to the new URL. While this can be time-consuming, it’s worthwhile for maintaining inbound link equity and referral traffic.

The update of your XML sitemap should follow a submission to major search engines. Your adjusted URLs get faster indexing through search engine systems after you submit your new XML sitemap to them. Many SEO plugins offer easy ways to generate and submit your sitemap.

Remember to review any third-party services, such as social media platforms, ad networks, and analytics tools, that reference your old URL. Update these services with your new URL to ensure continued functionality and accurate tracking.

Finally, ensure your site’s navigation elements, like breadcrumb trails, are updated to reflect the new URL structure. This provides a seamless user experience and proper site functionality.


Changing the URL on Your WordPress Site

Testing and Troubleshooting

After implementing the technical changes, testing your site to ensure everything functions properly is crucial. Start by navigating your site, checking that all pages load without errors. Verify that internal links point to the correct locations and that multimedia elements display as intended.

Use tools like Google Search Console and online URL checkers to identify broken links or redirect issues. Confirm that your 301 redirects are working and directing traffic from old URLs to the new ones.

Test your site’s contact forms, comment sections, and other interactive elements to ensure they work as expected. Double-check that your SSL certificate is correctly configured for the new URL and provides secure connections.

Track your site’s loading speed, as URL changes can sometimes impact performance. Use speed testing tools like GTmetrix or Google PageSpeed Insights to identify slowdowns.

Physical SEO performance assessment happens through keyword monitoring systems that track search engine exposure and keyword placement. Performance changes on your site can be tracked through SEMrush and Ahrefs together with indications for required sections to improve.

Your ability to test and troubleshoot problems through complete examination will help you resolve issues quickly to maintain a seamless URL migration.


Changing the URL on Your WordPress Site

Final Considerations

Once you’ve successfully changed the URL of your WordPress site, itโ€™s important to stay vigilant. Monitor your site’s performance, traffic, and search engine rankings closely to ensure the transition hasn’t negatively impacted your online presence. Regularly check for any broken links or missing media that may have been overlooked during the update process.

Keep your sitemap current and resubmit it to search engines if necessary. This will help them crawl and index your new URLs efficiently. To prevent confusion, inform your audience about the change through blog posts, newsletters, or social media announcements.

Stay proactive in checking your analytics to catch any unexpected drops in traffic or engagement. Utilize tools like Google Analytics and Search Console to gain insights into your site’s performance and identify any issues promptly.

Additionally, update any external platforms where your URL is listed, such as business directories, forums, and social media profiles. You need to focus on these SEO techniques to achieve a uniform digital presence while keeping your online site free from problems.

Your visitors will experience a smooth experience while your WordPress site maintains its integrity through your prompt action toward any detected issues.


Evaluating WordPress Cache Plugins: The Good and the Bad

Evaluating WordPress Cache Plugins

Introduction to WordPress Cache Plugins

Essential to website management within modern times exist both speed and efficiency requirements. Website performance enhancement relies heavily on employing WordPress cache plugins as crucial tools.

Internet users benefit from an improved experience when caching plugins store web page backups to lower page load time. The Guide to WordPress Cache Plugins examines both the advantages and disadvantages of these tools to help users select the right complement for their requirements.

A cache plugin generates static HTML files from your dynamic WordPress blog. After an HTML file is generated, your web server will serve that file instead of processing the comparatively heavier and more expensive WordPress PHP scripts. It minimizes the back-and-forth communication between the server and the database, streamlining the delivery of your web pages to visitors.

Implementing a cache plugin can be a simple yet highly effective way to optimize your site’s performance. Whether managing a personal blog, a business website, or an e-commerce store, a fast-loading site is key to retaining visitors and improving engagement metrics.

The cache plugin works to provide benefits to websites when they face high-traffic conditions. Your site server load decreases because these plugins provide cached pages to visitors who help maintain your site’s performance regardless of heavy visitor traffic.

Many websites find such features essential when encountering numerous visitors during promotional activities and unique sales offerings.

Selecting the correct plugin requires evaluation based on your website’s requirements. You must evaluate multiple factors between your technological skills, site complexity, and budget allocation before selecting a cache plugin because different options offer distinct features and capabilities.


Evaluating WordPress Cache Plugins

Advantages of Using Cache Plugins

One significant benefit of using cache plugins is the enhanced loading speed for your website. Website visitor maintenance benefits directly from both page loading speed increases and improved user experience. The rating system of Google search engines gives higher positions to websites which quickly display their content.

Cache plugins fulfill two important roles by providing cached content to users as they decrease server resource usage and reduce its workload. Server performance receives substantial benefit from the caching effect specifically when traffic reaches peak levels. Optimized server operations reduce hosting costs because less server power is needed to support more site visitors.

Another benefit of this system is improved operational performance across the entire website. When you reduce server requests and speed up page loading times, your website becomes more operationally smooth. The site performance upgrades will result in better responsiveness when visitors and administrators access the site.

A website gains operational efficiency through the complimentary features cache plugins provide. Users can benefit from improved load times through plugins that provide JavaScript and CSS file combinations and minimize features. Image optimization tools available in specific plugins enable users to optimize their files to achieve better speed performance without declining image quality.

A cache plugin helps websites control their bandwidth use through effective optimization. Web content delivery becomes faster because users receive cached versions of pages, which decreases the overall amount of data transferred to them regardless of their bandwidth constraints or data charge policies.

These plugins combine to provide multiple benefits which result in a website design with streamlined operations and cost-effectiveness along with better efficiency.

Disadvantages of Cache Plugins

Cache plugins, while beneficial, come with their share of challenges. One notable issue is the potential for compatibility problems with other plugins. With the vast array of WordPress plugins, a cache plugin might not work seamlessly with another tool you have installed, causing conflicts or site malfunctions. This can be particularly troublesome if the conflicting plugin is essential for your site’s functionality.

Another drawback is the complexity involved in setting up and configuring cache plugins. Many users, especially those new to WordPress, may find the settings overwhelming. Optimizing cache settings to achieve the best performance often requires a certain level of technical know-how. Incorrect configurations can lead to suboptimal performance or even slow down your site, counteracting the very purpose of the plugin.

Cache plugins can also sometimes lead to issues with dynamic content. For websites that frequently update or rely on real-time data, such as news sites or e-commerce platforms, caching can cause problems by serving outdated information to users. This requires careful management of cache settings to ensure that content updates are reflected promptly.

Additionally, many cache plugins offer advanced features but might have a steep learning curve. Users need to spend considerable time understanding and utilizing these features effectively. This can be a barrier for those who need a quick and easy solution to speed up their website.

Lastly, it’s worth noting that some high-end cache plugins come with a price tag. While free options are available, premium versions often offer better support and advanced features, which might be necessary for larger or more complex websites. This can add to the overall cost of maintaining your site.


Evaluating WordPress Cache Plugins

Popular WordPress Cache Plugins

WordPress offers a variety of cache plugins, each with unique features tailored to different user needs. WP Super Cache, W3 Total Cache, and WP Rocket are the most widely used and recommended options.

Users new to WordPress will find WP Super Cache easily usable which makes it an excellent choice for them. The tool turns your active WordPress data into static HTML files that enable faster page delivery to website visitors thus lowering server strain. Users who need simple performance-enhancing solutions without complex operations can quickly implement this cache system through its basic setup process.

Users can tailor their sites extensively through W3 Total Cache plugin because of its rich set of features. The plugin includes several caching methods including page caching database c, aching, object caching and browser caching.

The connection of W3 Total Cache to content delivery networks results in supplementary site performance enhancements and speed acceleration. Advanced users need coding skills to operate W3 Total Cache as part of their work on maintaining complex websites.

WP Rocket has gained user popularity since it brings solid performance capabilities together with user-friendly settings. The plugin features friendly interface systems that control powerful features which integrate page caching together with automated cache preloading and lazy image loading capabilities.

The site speed enhancement tool of WP Rocket lets users merge their JavaScript and CSS files at the same time. High investment in WP Rocket benefits users because the plugin offers extensive features and reliable technical help.

Adopt the following criteria to select these plugins: your website requirements together with your skill level and website content characteristics. The specific choice between different plugins will produce noticeable improvements in your website performance together with its user experience.

Choosing the Right Cache Plugin

Selecting a cache plugin requires a thoughtful approach to match your website’s needs. Start by assessing your technical skills; some plugins offer a user-friendly setup, while others may need advanced knowledge.

If you’re a beginner, opt for simpler plugins like WP Super Cache, which offers basic yet effective caching options. Users with technical skills will find particular value in W3 Total Cache due to its advanced customization capabilities and multiple caching feature options.

The selection depends on the particular features required for your application. For instance, if your site relies heavily on dynamic content, look for a plugin with fine-tuned settings to manage cache expiration and updates. WP Rocket is a great choice for its robust features, including cache preloading and lazy loading of images, which can significantly boost performance.

Budget is another critical factor. While free plugins are available and can be effective, premium options like WP Rocket often offer additional features and better support. Weigh the benefits of these features against the cost to determine if the investment is justified.

You must conduct performance tests of your plugins by utilizing Google PageSpeed Insights and GTmetrix to evaluate their effects on site speed. To find the plugin that provides maximal performance benefits and matches your requirements you should try different options.


Evaluating WordPress Cache Plugins

Conclusion and Recommendations

Choosing an appropriate WordPress cache plugin to optimize your website performance is essential. Users need to know their technical level and site requirements before choosing from different WordPress cache plugins. The WP Super Cache plugin serves as an excellent beginner solution that combines simplicity with efficient performance.

Users who need complete customization and robust performance features should select W3 Total Cache because it caters to complex website requirements. The premium cost of WP Rocket grants users a blend of firm capabilities and intuitive operation, thus making it an affordable purchase for numerous website owners.

Consider not only the features but also the potential drawbacks, such as compatibility issues and the complexity of setup. Testing different plugins using tools like Google PageSpeed Insights can help you identify the most effective solution for your site.

Your decision to evaluate cache plugin options will help you select one that enhances both site loading time and user experience which boosts search engine rankings along with overall site efficiency.


Plugins to Safeguard Your WordPress Installation

Safeguard Your WordPress Installation

Introduction to WordPress Security

When managing a WordPress installation with plugins, the security of your site should be a primary concern. The popular content management system WordPress invites a variety of hackers who attack its users. The security of your WordPress installation requires high priority to defend your website’s integrity and data safety.

One of the main reasons WordPress sites become targets is their popularity and the vast number of third-party plugins and themes available. Plugins and themes that extend WordPress functionality may create vulnerabilities since outdated maintenance and a lack of proper verification can be problematic. Site owners must recognize possible security threats and implement preventive actions against them.

The security function of WordPress installations depends heavily on security plugins. Login protection amplification and malware detection together with firewall defenses are features website owners receive from security plugins. Users can defend their sites with multiple security features by using security plugins which grant integrated protection capabilities.

Besides plugin use your website security will increase when you implement basic practices such as routine system upgrades and backups and strong password protocols.

Frequent updates ensure that any known vulnerabilities are patched, while backups provide a safety net in case of a security breach or data loss. Two-factor authentication working with strong password policies creates multiple hurdles for unauthorized attempts during security breaches.

The most powerful method to defend your WordPress system involves complete security protection. Security plugins function alongside knowledge of security risks to help users lower their website vulnerability to attacks.


Safeguard Your WordPress Installation

Choosing the Right Security Plugin

Selecting the right security plugin is essential for protecting your WordPress installation. To find suitable plugins, focus on three essential elements: usability, full functionality, and support for your current configuration. The essential elements you should search for in plugins include malware detection software, firewall protection, enhanced authentication security, and time-based threat detection capabilities.

Popular security plugins such as Wordfence Security, Sucuri Security, and iThemes Security offer a range of capabilities to suit different needs. Wordfence Security provides robust firewall protection and malware scanning, making it a favorite among users. Sucuri Security excels in its website firewall and monitoring features, offering protection against threats. iThemes Security strengthens user credentials and prevents unauthorized access through login security measures.

Before deciding, assess what specific features are most important for your site. For instance, if login security is a priority, opt for a plugin that includes two-factor authentication and limits on login attempts. If real-time monitoring is crucial, look for plugins offering detailed activity logs and instant alerts.

Also, consider the level of support and documentation available for each plugin. Users often find comprehensive guidelines and prompt support teams at their service to fix problems while utilizing the plugin’s entire capacity of features. Select a plugin that suits your technological background since it should include support features for maintaining site security.

Your evaluation of security factors helps identify which WordPress plugin offers maximum protection for your WordPress platform.

Setting Up Your Security Plugin

After you’ve chosen a security plugin, the next step is configuring it to ensure optimal protection for your site. Start by downloading and activating the plugin through your WordPress dashboard. Once activated, navigate to the plugin settings and familiarize yourself with the available options.

Users must turn on firewall protection together with routine malware scans through scheduling for early threat identification. Set your desired notifications to gain instant alerts regarding any security dangers affecting your website.

Consult the plugin’s documentation or support resources to understand how to leverage its full capabilities. Certain plugins include additional security features that allow your site to improve protection through login security improvements and tracking activity logs. When setting them up, you must adjust security configurations according to your organizational requirements.

Additionally, take advantage of any available tutorials or guides provided by the plugin developers. These resources can help you navigate the setup process and troubleshoot any issues. Ensure all configurations are thoroughly tested to confirm they are working as intended.

By dedicating time to configure your security plugin correctly, you’ll be better equipped to protect your WordPress installation from potential threats.


Safeguard Your WordPress Installation

Enhancing Login Security

The login process is a primary target for malicious attacks on any WordPress site. Security of your site depends on proper implementation and maintenance of this aspect. Two-factor authentication (2FA) operates as an efficient security approach to implement extra layers of protection.

Your security system requires users to verify their identity with a mobile device code alongside their password to create almost insurmountable barriers against unauthorized access.

Password protection systems should limit the number of login attempts performed by users. Many security plugins allow you to set thresholds for failed login attempts and temporarily block users who exceed these limits. Strong password rules protect against hackers who perform repetitive password combinations for unauthorized access.

Additional security protection can be achieved through strong password regulations. Users need to create complex passwords using different characteristics consisting of letters and numbers with added unique symbols. Some security plugins even offer password strength checks to ensure compliance with these policies.

Additionally, consider changing the default login URL from “wp-admin” to something unique. A single security measure obstructs cybercriminals from finding login pages to perform unpermitted access.

These security measures substantially enhance your WordPress login security, which minimizes opportunities for unauthorized access to your website.

Regular Updates and Backups

Keeping your WordPress installation and its plugins updated is crucial for security. Updates often contain fixes for vulnerabilities, so applying them promptly is essential. Enabling automatic updates whenever possible reduces the risk of missing updates. The backup system protects your site against recently found security threats.

A complete security system depends on regular backups as a crucial element. Site security protection hinges on backup procedures that operate automatically for safety reasons during security breaches and data loss incidents.

Reputable backup plugins will automatically create recent site backups to provide you with secure duplicates. Several storage locations including both cloud-based solutions and local hard drives should be used to back up your data so your information remains accessible.

Periodic testing of your backups remains significant in maintaining their effectiveness. Complete backups will be usable for restoration because this testing process ensures they contain no issues. The process of verifying your backups enables you to prevent problems when recovering your system.

Beyond just your siteโ€™s content, back up your database and any custom configurations. Using this technique enables full recovery of all website parts and components. Your WordPress platform gains superior protection against system risks and fast recovery during troubles when you use normal updates with backup schedules.


Safeguard Your WordPress Installation

Monitoring and Alerts

Keeping a vigilant eye on your WordPress site is essential for maintaining security. Configure your chosen security plugin to send alerts for repeated failed login attempts, changes to core files, and unexpected user actions.

The prompt alert review process enables you to detect security threats early, thus facilitating rapid incident response. Security logs must be reviewed as part of your regular activities since patterns within these logs can signal possible organized attacks.

The proactive follow-up detects breaches simultaneously with the revelation of attacker methods which allows for developing appropriate defense measures.

The implementation of server-level monitoring should be considered alongside plugin alerts because it detects security events that might bypass application-level monitoring.

Modern security plugins now offer third-party integration which expands the visibility of your website security indications through monitoring services. Set up email or mobile notification alerts to stay instantly notified about severe system issues by configuring your security settings.

Security reviews happen more frequently to find weak points that demand improvement. Alert-triggered immediate action protects minor issues from escalating into major problems. WordPress security demands awareness and speedy reaction to all received security alerts and their effects on your strategy.


Safeguard Your WordPress Installation

Conclusion and Best Practices

The primary requirement for sustaining WordPress site security is regularly implementing best practices. Finding and implementing a comprehensive security plugin should be your first action point. Setting up the plugin requires proper configuration steps for features that include malware scanning and firewall protection.

Your website protection must include enhanced login security, which allows for the adoption of two-factor authentication and the setting of restrictions for login attempts. The regular execution of updates for WordPress core, along with plugins and themes, serves to fix documented vulnerabilities immediately.

Develop a secure backup system that distributes backups between multiple locations to guarantee maximum redundancy. Security alerts and review of logs should remain active to detect potential threats during their initial stages. The effective security of your WordPress installation and user protection becomes possible through proactive implementation and continuous information acquisition.

Your Guide to Fixing Common MySQL Server Problems

MySQL Server Problems

Introduction to MySQL Server Issues

Peak system performance demands proper management of problems created by MySQL server operations in numerous applications. Normal operation of MySQL servers frequently leads to connection failures, performance deceleration and storage space limits while data integrity issues, security attacks are regular occurrences.

Effective troubleshooting needs awareness about existing problems and their expected impact on resolving them.

Your database accessibility through connections gets disrupted, which causes overall applications to break down. Various elements, including misconfigured server settings and network disruptions, lead to these issues. Addressing connection problems promptly can prevent downtime and ensure uninterrupted access to your data.

Operational delays and diminished efficiency become significant problems when performance bottlenecks develop within systems. Performance problems affect the system because of badly designed queries and inadequate hardware and incorrect server setup choices.

Performance issue resolution must identify essential database source factors because it maintains database operations with proper speed and efficiency.

Insufficient storage capacity together with inadequate memory allocation leads to critical operational issues. Your database expands to fill up available storage space which leads to performance reduction. Your MySQL server operation slows down and productivity decreases when you do not provide enough memory resources.

Data corruption affects database reliability and destroys its integrity values while functioning as a significant database problem. Adding timed data validation systems provides organizations with the ability to recognize potential data corruption that supports both the prevention of data loss and factual data preservation.

The requirement of robust security measures arises from security threats which include unauthorized access and SQL injection attacks. Strengthening password policies while controlling user access and maintaining an updated server forms the core of protection against MySQL server threats. Proactively resolving these standard problems leads to a dependable and efficient MySQL server platform.


MySQL Server Problems

Understanding Connection Problems

Connection problems in MySQL servers can stem from a variety of sources, including incorrect server configurations, network issues, or user authentication errors. To diagnose connection failures, begin by examining the server’s error log for specific messages that may indicate the root cause. Ensure that the MySQL server is active and that the correct port is open and accessible.

User authentication errors are a common source of connection issues. Verify that user credentials are correct and that they have the necessary permissions to connect to the database. Misconfigured server settings can also hinder connections. Double-check your MySQL configuration files to ensure that settings such as `bind-address` and `skip-networking` are correctly configured.

Network problems can also disrupt connections. Test the network connection between the client and the server to rule out interruptions or latency issues. If a firewall is in place, ensure it is not blocking the required ports for MySQL.

If connection problems persist, try connecting from a different network to isolate whether the issue is network-specific. The diagnosis of network issues benefits from the implementation of `ping` and `traceroute` utilities. Your effort to resolve connection problems should focus on systematically examining the potential failure points to restore access to your MySQL server.

Addressing Performance Bottlenecks

Performance bottlenecks often arise from inefficient queries, inadequate hardware resources, or improper server configurations. The first step to improving performance is analyzing slow query logs to identify and optimize slow-running queries while enhancing execution time.

Performance queries can be speeded up through the use of indexing methods. The current server hardware needs assessment should determine whether new infrastructure needs to be acquired to meet workload needs.

Proper configuration optimization serves as the key requirement to enhance server performance. Your adjustments to buffer sizes and your optimization of cache allocation should match the requirements of currently active workload operations.

For instance, increasing the InnoDB buffer pool size can significantly improve database performance by reducing disk I/O. Similarly, configuring the query cache can lead to faster query execution times.

Regularly monitor system performance using tools like MySQLโ€™s performance schema or third-party monitoring tools. The solution enables fast performance tracking which lets immediate problem-solving take place. Connection pooling functions to reduce operational expenses by using efficient resource management for database connection reuse.

Proper design of your database schema represents a practical solution. Regular data normalization helps reduce storage requirements by eliminating redundant data entries and selecting adequate data types, which provides additional storage optimization opportunities. Better database performance results from database maintenance operations and frequent statistical updates and table defragmentation operations.

You can solve performance issues and maintain a prompt MySQL server by using a strategic approach to optimize database queries and hardware resources and server configurations.


MySQL Server Problems

Dealing with Storage and Memory Limitations

Storage and memory constraints can critically affect your MySQL server’s performance. Identifying disk usage patterns requires regular checks, but you can create space by archiving or deleting old information. Partitioning methods enable better management of large tables by improving their operational efficiency.

Memory allocation is equally essential. Ensure your server has adequate RAM for the workload. Configuring the InnoDB buffer pool and query cache can help manage memory utilization effectively. The optimization of performance combined with memory bottleneck prevention results from this technique.

The technique of compressing data becomes important when disk storage capacity becomes limited. The implementation of data compression comes with CPU overhead that should be carefully considered. Regularly updating your storage configurations to match the growing data requirements will keep the server running smoothly.

Another crucial practice is monitoring temporary files and logs that consume disk space. Configuring log rotation and cleaning up temporary files periodically can prevent disk space from being unnecessarily occupied. The methods aid in preventing storage and memory issues which make your MySQL server operate efficiently under various operational conditions.

Handling Data Corruption

Data corruption is a serious MySQL server problem that can compromise data integrity and lead to data loss. Signs of corruption may include unexpected error messages, missing data, or inconsistent query results.

To address data corruption, first attempt to repair the affected tables using the MySQL REPAIR TABLE command. Regularly back up your data to facilitate recovery in case of severe corruption. To prevent future issues, implement consistency checks and consider using the InnoDB storage engine, known for its data integrity features.


MySQL Server Problems

Managing Security Challenges

A secure MySQL server implementation protects against multiple forms of attack that arise from weak passwords and exposed ports for SQL injection threats. To establish basic security, all user accounts should have strong and different passwords implemented first. Updating passwords regularly provides additional protection to your system.

Managing user privileges by granting only the necessary access can significantly reduce potential vulnerabilities. Your server requires a firewall for protection because it must remain available only through established secure protocols. Regular updates for your MySQL database play an important role since they defend your system from already discovered vulnerabilities.

SSL/TLS encryption of all connections linking MySQL server to application clients should be used for enhanced security through data interception prevention. The combination of these safety protocols protects your MySQL server against unauthorized intrusion along with safety hazards.


MySQL Server Problems

Conclusion and Resources

Maintaining a MySQL server can be challenging, but with the right approach, these challenges can be managed effectively. The document provides a detailed evaluation of typical technical issues that users encounter through unstable connections combined with slow performance together with storage limitations and data security threats.

Before performing troubleshooting, you must know exactly which components cause these issues. For instance, connection problems often stem from misconfigured settings or network disruptions. Identifying and resolving these issues promptly can help prevent downtime and ensure continuous access to your data.

Performance bottlenecks, on the other hand, often arise from inefficient queries or insufficient hardware resources. Database operations will stay smooth and responsive when queries receive optimization, and hardware receives updates.

All storage and memory issues require both proactive monitoring and management procedures. The optimization of performance and prevention of bottlenecks can be achieved through data archiving or deletion combined with proper memory settings management.

Data corruption constitutes an urgent issue that needs immediate consideration. Storage engines that show reliability in combination with consistency checks serve as protections for ensuring data integrity remains safe.

Security remains a paramount concern. Security depends on using powerful passwords together with controlled access privileges and maintaining routine server updates to protect MySQL servers. The security of data during transmission becomes more substantial through the use of SSL/TLS encryption methods.

The primary need is understanding MySQL problems and their solutions, but extra resources can provide further value to your system management. Starting your MySQL toolkit research with the official documentation provided by MySQL will help you reach a deep technical understanding and best practices.

Users can find essential MySQL database information through the MySQL community site and Stack Overflow since it contains developer experiences on handling database challenges. Students can benefit from the structured teaching of online tutorials and courses which provide extensive instruction on MySQL server management.

Achieving long-term success in MySQL management demands time investment in training and knowledge maintenance of current updates and security improvements. Regularly participating in webinars and reading industry blogs can inform you about emerging trends and potential issues in MySQL server management.

Those who require more hands-on support should consider hiring a MySQL consultant or subscribing to a managed database service. The organization’s specialists will develop personalized solution recommendations for your framework problems.

Several issues can affect MySQL server management however obtaining cause understanding and accessing excellent resources helps render this task less challenging. Taking preventive measures for your MySQL server will protect both its performance and security, along with maintaining data integrity.

Leveraging the wealth of information available through documentation, community support, and professional services can equip you with the knowledge and tools needed to manage your MySQL server effectively.


Keeping Data Safe: The Importance of Regular Backups

The Importance of Regular Backups

Introduction to Backups

The digital age, combining personal and professional data, demands absolute information protection. Many factors, including system hardware failures and cyberattacks, cyberattacks, and accidental human mistakes, cause data loss incidents. Unexpected incidents cause major interruptions that frequently include monetary losses and personal disruptions.

Protective backups must be performed regularly to eliminate these potential threats. These safety backup mechanisms enable you to return all information to its previous condition during system failures.

Data management requires this process as its implementation goes beyond best practices. Regular backups allow you to protect your current data and quickly recover it when needed since they happen regularly.

Backups are often perceived as challenging by those lacking technical experience handling technology systems. The backup process becomes easier through the use of cPanel. The control panel provides an easy-to-use interface that enables all users to create and manage backups irrespective of their technical abilities.

Incorporating regular backups into your routine can prevent the stress and hassle associated with data loss. The peace of mind of knowing your data is secure cannot be overstated. Every person with valuable digital assets, business owners, and web admins needs to establish robust backup systems.

Data backup performed in advance shields information from long-term risk factors. Due to its critical nature, modern technology requires users to prioritize consistent backup maintenance.


The Importance of Regular Backups

Understanding cPanel

cPanel is widely recognized for its user-friendly web hosting control panel that simplifies the management of website resources. The system has an interface that enables users at all skill levels to perform numerous administrative functions efficiently. The backup functionality in cPanel stands out as a prime feature since it provides users with an easy solution for data security.

With cPanel, creating and managing backups becomes a hassle-free process. Users have different options on this platform to automate backup processes through scheduled backups at pre-determined time points.

The automated scheduling system of backups keeps your data current and hands-free. Additionally, cPanel supports partial and complete backups, allowing users to choose which aspects of their website to back upโ€”databases, email accounts, or website files.

Another significant advantage of cPanel is its integration with external storage solutions. Users can store their backups on local servers, remote FTP locations, or cloud storage services. This flexibility in storage options enhances data security by offering multiple avenues for data redundancy.

File restoration is also a breeze with cPanel. The control panel includes easy-to-use data restoration tools for users to recover their data through backup files during data loss or corruption events. Website recovery operations can happen quickly through this system without significantly affecting operational performance.

The backup functions within cPanel operate with both power and convenient usability. Nearly all backup processes become convenient through cPanel due to its simple interface for scheduling storage and restoring valuable data.

Setting Up Backups in cPanel

Creating backups in cPanel is straightforward. Here’s a step-by-step guide:

1 ) Log into cPanel: Access your cPanel account using your credentials.

2) Navigate to the Backup Section: Find the ‘Backup’ or ‘Backup Wizard’ icon inside.

3) Choose Backup Type: Select whether you want a full or partial backup. A full backup includes all website files, databases, email accounts, etc., while partial backups allow you to select specific components.

4) Select Backup Destination: Choose where to store your backup. cPanel allows storage on local servers, remote FTP locations, or cloud storage solutions.

5) Start the Backup Process: Initiate the backup process. Depending on the amount of data, this could take some time.

6) Download or Verify Backup: Once complete, download the backup file for added safety or verify its integrity through cPanel’s interface.

Through cPanel, users can set automatic backup schedules as part of their backup settings for unattended regular backup updates.


The Importance of Regular Backups

Benefits of Regular Backups

Regular data backups provide various advantages for protecting data integrity and ensuring accessibility. Data restoration becomes possible quickly when unforeseen incidents such as technical malfunctions or cyberattacks occur. Regular backups make it simpler to protect essential business functions which defends operations from major interruptions and prevents revenue decline.

The practice of backing up data leads to the successful protection of entire historical information. Regular backups create multiple copies of your data over time, allowing you to revert to previous versions if needed. They also prove beneficial for protecting data that has become corrupted and enabling easy retrieval of information from any preceding date.

Backup procedures implemented regularly protect against users’ accidental mistakes. System damage and file elimination through human error can develop from seemingly unintentional actions taken while operating a computer. An up-to-date backup system enables users to rapidly reverse mistakes by returning their files to their original condition.

Regular backups improve system-wide data security. Saving duplicate data in several locations prevents your information from being lost due to a system failure at one location. Data protection quality depends on backup diversification because it provides multiple methods to restore data during emergencies.

Backup systems establish indispensable tools that organizations need to fulfill their legal and regulatory obligations. Different industrial businesses must establish data retention policies that require regular backup methods. Following these guidelines increases your compliance with industry standards and data protection.

An efficient backup solution enables better client trust thus generating superior satisfaction. The combination of secure data storage together with rapid data restoration capabilities allows clients to trust your business better.

Your organization’s achievement of long-term success depends on building mutual trust relationships with clients which creates a positive reputation for your business.

Strategies for data management require regular backup systems because they maintain operational continuity as well as security and reliability.

Common Mistakes to Avoid

One frequent mistake people make is relying solely on one backup method. You should create a backup strategy that combines three secure storage solutions between local servers, remote FTP locations, and cloud storage platforms. Storage facilities across different locations, local servers, and remote FTP locations provide safer backups.

Another error is neglecting to schedule regular backups. Having outdated backups can be nearly as problematic as not having backups because they may not reflect the most recent state of your data. Automating backups using tools like cPanel can help maintain up-to-date copies without manual intervention.

A third mistake is not verifying the integrity of your backups. It’s crucial to periodically check that your backup files are complete and can be restored successfully. Failing to do so may result in unpleasant surprises when you need to recover data urgently.

Another common oversight is not storing backups in geographically diverse locations. Keeping all your backups in one place, local or remote, can make them vulnerable to regional disasters such as floods, fires, or power outages.

Lastly, many people underestimate the importance of encrypting their backup data. Without encryption, sensitive information is vulnerable to unauthorized access during storage or transfer. Backup tools provide encryption options that make your valuable data more secure.

Absolute improvement in your backup strategy comes from avoiding these crucial errors which provide enhanced security with easy data recovery capabilities.


The Importance of Regular Backups

Conclusion

Businesses must prioritize implementing dependable backup systems because this guarantees safety and ready access to their digital property over time. Operational backup solutions available through cPanel provide both easy usage and efficient backup services that enable users to simplify backup processes by incorporating them into their regular data management routines.

A backup schedule reduces the chance of information loss due to hardware breakdowns, cyber-attacks, and human mistakes by quickly recovering original data files.

The main advantage of performing regular backups is that they reduce operational interruptions and system downtime when data gets lost. Your business avoids problems and expenses because quick data retrieval reduces tension levels and operational stability.

Regularly updated backups also preserve historical data, allowing you to revert to previous versions if necessary. This can be invaluable for retrieving critical information or undoing changes that may have negatively impacted your system.

Using cPanel for backups offers the added advantage of automating the backup process. The automatic backup system keeps your data current without human supervision thus simplifying the process of maintaining recent information.

The platform allows users to store data across multiple options which cover local servers and remote FTP locations and cloud storage to enhance data security through diversity.

Businesses in different industries must maintain regular backups because doing so satisfies both legal standards and regulatory mandates. Consistent and reliable backup methods make data retention policies easy to meet and avoid legal challenges. This approach ensures data protection alongside compliance with industry standards.

Encryption offers an overlooked added security feature as its primary benefit. Encrypting your backup data protects it from unauthorized access, safeguarding sensitive information during storage and transfer.

Implementing regular backups using cPanel tools is essential and secure as an element of data management strategy. The application provides data protection security, quick incident recovery, and emotional reassurance about safeguarding digital assets.


Strengthening Your Site: Key Security Settings in cPanel

Key Security Settings in cPanel

Introduction to cPanel Security

Website protection has become more vital than ever because digital threats are growing complex in our current era. cPanel supplies a complete collection of protection features to protect your site.

Every website owner must learn to use these security options because they safeguard their digital resources, whether they handle personal or business web platforms.

Through its user-friendly interface, cPanel helps users quickly implement robust security measures. Multiple security features in these tools protect users from unauthorized access and encrypt their data while securing their personal information. Your tools create a secure website delivery environment that protects users during sessions.

Your site security process begins by studying the security options cPanel presents in its “Security” section. This security area enables you to implement firewalls that block dangerous traffic, establish SSL/TLS certificates for data encryption, and manage IP addresses to determine site access permissions. Collectively, these features form the foundation of a secure security framework.

Through its suite of security features, cPanel gives users access to directory protection tools, two-step authentication options, and automated software update services to receive the most recent security fixes. The platform provides straightforward access to configuration choices, which demand no intricate tech skills to alter your settings.

Exploiting cPanel’s security protections can considerably improve your website security. The following section explores practical configuration instructions for establishing a safer online platform.


Key Security Settings in cPanel

Configuring Firewall Protection

Through protective online barriers known as firewalls, your website stays protected from dangerous online traffic until all potential threats are filtered out. Setting up a firewall in cPanel is straightforward. Navigate to the “Security” section and select the firewall option. You can initiate configuration settings to build a strong site defense.

The firewall setup process depends on creating rules that define which network traffic should be authorized access and which types should be blocked.

For example, you can block traffic from certain countries known for high levels of cybercrime or restrict access to particular IP addresses that have shown suspicious activity. By customizing these rules, you can better tailor your firewall to protect your specific needs.

Another important aspect of firewall configuration in cPanel is monitoring and logging. Monitoring blocked and allowed traffic indicates what threats exist so you can make better security choices for your site. cPanel firewall tools include real-time monitoring and logging functions, which assist users in effectively monitoring their siteโ€™s security status.

Periodic firewall-setting reviews, together with regular updates, should be treated as necessary tasks. Your firewall rules should be revised periodically to counter new security threats for optimum website protection. A consistent process of firewall management through cPanel alongside regular updates allows you to maintain strong security measures that protect your website from progressively changing cyber threats.

Implementing SSL/TLS Certificates

SSL/TLS certificates are crucial for securing the data exchanged between your website and its visitors. To install an SSL certificate through cPanel, navigate to the “SSL/TLS” section and follow the straightforward installation instructions provided. Once installed, your site will switch from HTTP to HTTPS, ensuring that all data transmitted is encrypted.

SSL/TLS certificates create an encrypted environment to safeguard private information such as account credentials, personal details, and financial payment data from unauthorized interception. Through powerful encryption, your users’ information remains secure, and at the same time, your site develops better credibility while gaining trust from visitors.

Google prefers HTTPS encryption websites because it improves search rankings and visibility. Modern browsers trigger warning alerts against HTTPS websites that might prevent users from visiting them. Your site needs an SSL certificate because it improves system security as well as user interface quality.

cPanel provides administrative tools that enable certificate management for permanent data encryption conservation. Check your certificate’s validity status regularly to confirm its current status and most recent update. Through SSL operation, your website maintains secure connections and protects the integrity of exchanged data.


Key Security Settings in cPanel

Utilizing cPanel’s IP Blocker

The cPanel IP Blocker tool enables website restriction for security purposes. This essential feature allows you to block particular IP addresses with complete network ranges, stopping unauthorized users from accessing your website. To use the IP Blocker, navigate to the “IP Blocker” section in cPanel, enter the IP address or range you wish to block, and apply the changes.

The IP Blocker functions most effectively when it stops malicious IP addresses from specific regions when cyberattacks are known to occur. Active blocking of specific IP addresses helps significantly lower the risk of unauthorized access while preventing security breaches. Users can manage access based on IP addresses that display suspicious behavior or keep making unauthorized login attempts.

Upgrading the blocked IP address list regularly leads to optimal security measures. Regular updates to your blocked IP addresses prevent new security threats from reaching your site.

cPanel’s IP Blocker interface is straightforward, allowing you to easily manage and modify your IP restrictions as needed. This tool benefits your overall security plan by protecting your website while improving the safety of your user experience.

Setting Up Directory Privacy

cPanel’s “Directory Privacy” feature allows you to control access to specific directories on your website by setting up password protection. This tool is essential for safeguarding sensitive data and ensuring only authorized individuals can view or modify particular directories. To start, navigate to the “Directory Privacy” section within cPanel. From there, you can select the directory you want to protect and enable the password protection feature.

You must pick a desired directory before creating username and password credentials. Choose an original, robust password that provides the best security protection. Once these credentials are set, anyone attempting to access the protected directory must enter the correct username and password.

The password protection system is ideal for directories which require restricted or confidential content access since it enables protection of sensitive information. Blocking unauthorized entry allows you to protect both your files from alteration and to keep sensitive information areas hidden from public view.

The cPanel system enables users to implement password security protocols and establish user access permissions. This system provides an efficient method for choosing directory access users and modifying their permissions, allowing users to maintain flexible directory protection controls.

Regularly updating passwords and reviewing user permissions can further enhance the security of your protected directories.


Key Security Settings in cPanel

Enabling Two-Factor Authentication

Two-factor authentication (2FA) significantly boosts the security of your cPanel account by requiring an additional verification step. This second layer typically involves a code sent to your mobile device or generated by an authentication app. To enable 2FA in cPanel, go to the “Security” section and look for the two-factor authentication option.

Follow the on-screen instructions to set it up, which usually involves scanning a QR code with your mobile device and entering the generated code to confirm the setup. By implementing 2FA, even if someone obtains your password, they still need access to your second factor to gain entry.

This makes unauthorized access much more difficult. Regularly updating your 2FA settings and ensuring secure authentication can enhance your account protection.


Key Security Settings in cPanel

Regularly Updating Software

Regular updates are a cornerstone of maintaining a secure website. When using cPanel, keeping the control panel and all associated applications current ensures you’re protected with the latest security patches and enhancements. Software vulnerabilities exploited by cyber attackers appear when software is not updated regularly because it remains outdated.

Through cPanel, users can set up automated update functionality, which reduces the time needed to maintain system security measures. This feature runs software updates automatically, preventing manual checks for operational versions. Implementing this practice ought to be mandatory for security applications, security plugins, and content management systems because they regularly need updated vulnerabilities.

The update logs serve to track website security transformations and system advancements and system status information. While automated updates handle most of the work, periodically reviewing these logs helps ensure everything is functioning correctly.

Update releases remain essential because they ensure proper compatibility between the system components. Software updates enhance system function and user performance, resulting in improved overall system operation.

Updated software creates two essential benefits that defend your site from security threats along with enhancing operational efficiency.

Users who prefer self-managing updates have an alternative to set a scheduled check for the latest updates. System security, along with smooth protection operation, depends on regular software update checks that defend your system against breaches. You regularly monitor site updates to ensure both system reliability and decreased security vulnerabilities.

Whether you depend on automatic updates or perform manual checks, both methods lead to essential site security through updated software versions. This practice allows protection of your website against potential risks and enhances performance by resisting modern security threats.

Enhanced Speed and Efficiency in cPanel

Speed and Efficiency in cPanel

Introduction to cPanel

A powerful control panel named cPanel enables convenient management of web hosting environments. Users benefit from a user-friendly interface, which makes it possible for both novices and experts to perform different administrative tasks.

The cPanel system provides its users complete access to diverse program suites, enabling hassle-free web administration through domain and database management and email support.

User-friendly system design on the platform grants people with minimal technical skills the ability to work efficiently on advanced processes.

Whether you need to set up a new email account, manage website files, or monitor server performance, cPanel’s organized dashboard helps you quickly find the necessary tools. The centralized platform decreases the complexity of learning and provides efficient control for your website administration.
cPanel’s hosting capabilities extend beyond standard web hosting responsibilities. Advanced features like Cron Jobs for task automation, SSL/TLS for secure connections, and various security tools for safeguarding your web environment are all easily accessible. Because of this functional depth, you can effectively execute both web hosting management and optimization tasks.

The cPanel platform features extensive plugin capabilities that let users customize their control panel interface for personal use requirements. Whether you want to enhance functionality with third-party applications or improve site performance with caching solutions, cPanel offers the flexibility to adapt to your requirements.

The cPanel helps you simplify your hosting environment management processes so you can keep your attention on business development aims and your online presence growth. All web admins should consider cPanel their essential management tool because it combines advanced features and easy-to-use design.

 

Speed and Efficiency in cPanel

Optimizing cPanel Settings

Customizing the interface settings in cPanel can significantly enhance your user experience. Adjust the layout to ensure the tools you use most frequently are easily accessible. The user can optimize workflow by placing interface elements through drag-and-drop functionality, reducing the time needed to navigate the system.

Users need to enable features that improve performance while making sure they customize their interfaces properly. Certain features might be unnecessary for their specific needs, and disabling them can significantly improve load times and overall responsiveness. For example, disabling unused modules can free up resources, allowing cPanel to run more efficiently.

Activating advanced features designed for speed is another effective strategy. cPanel’s built-in caching options serve two purposes: decreasing server load and optimizing web page speed. These tools can quickly store popular data to improve website loading speed for visitors.

Through cPanel you can monitor server performance and optimize it using its built-in tools. Real-time resource monitoring through cPanel helps users maintain visibility into current resource utilization to fix performance obstacles quickly. Assessing these performance metrics allows you to determine when essential changes need to be made to preserve peak efficiency.

Make use of cPanel automation tools to automate critical maintenance operations which include both clearing caches and system updates. Routine implementations of automation processes deliver precise and automatic executions which save your time and prevent human errors.

The optimization-specific approach produces a better cPanel system fit for your unique needs which enhances your web hosting environment management.

Streamlining File Management

Efficient file management is essential for maintaining an organized web hosting environment. File management tasks through cPanel have become easy and robust because the tools don’t require FTP software to execute the basic upload, delete, and edit functions.

The file manager interface teaches users how to execute its functions, such as folder compression and permission definition, and other functions through its interface.

Successful file and directory arrangement is an essential requirement for achieving optimal file management optimization. A well-organized directory structure not only aids in easy navigation but also reduces the risk of accidental data loss.

A standardized filing scheme accompanied by a logical directory structure will enable fast file access, and regular cleaning of unneeded files must be performed to maintain efficient storage resources.


Speed and Efficiency in cPanel

Managing Databases Efficiently

The smooth operation of your website heavily depends on database management, which cPanel simplifies through the powerful tools it has. The MySQL Databases system and phpMyAdmin offer basic interfaces that enable non-technical users to manage databases through simple frontends.

To start, navigate to the MySQL Databases section in cPanel. You can easily create new databases and add users with specific permissions. This ensures that you can control who has access to sensitive data, enhancing your website’s security.

Once your database is set up, phpMyAdmin offers a web-based interface for managing the data within your databases. You can run SQL queries, import and export data, and perform various other tasks directly through the browser.

cPanel enables you to program database backup routines for automatic data preservation so you maintain complete data security and disaster recovery capabilities. The built-in feature reduces the chance of losing essential data while creating a feeling of security for users.

With cPanel, users can access database optimizing and repair functions. Website performance improves through regular optimization because the database structures become optimized for better data retrieval efficiency. Databases need repairing to solve system errors which keeps your website operational.

Through cPanel, users can create secure remote database connections, which serve as functional tools. cPanel enables remote database configuration, which brings essential advantages to users operating between multiple servers or working with databases located in multiple areas.

You can use these database management tools in combination with features to operate your databases properly, allowing your website to reach its maximum performance potential. With cPanel’s comprehensive database management options, even users with limited technical skills can handle complex database tasks with ease.

Enhancing Security Measures

Web environment security demands immediate protection, which cPanel provides through its defense-strengthening tools. Every account needs a powerful password consisting of letters, numbers, and special characters to protect against unauthorized access.

Two-factor authentication (2FA) through cPanel provides enhanced security by requiring users to verify their identity with a password and receive a code sent to their mobile device.

Another effective security measure is utilizing cPanel’s IP blocker feature. This tool enables you to control cPanel interface access by creating barriers for specific IP addresses. Blocking known malicious IP addresses through this tool ensures unauthorized access attempts are stopped, which improves total hosting environment security.

Upgrading the software on schedule is essential because it preserves your system’s security. Outdated software can have vulnerabilities that hackers can easily exploit.

cPanel simplifies the process by offering automated updates, ensuring your system is always protected against the latest threats. Keeping all installed applications, including third-party plugins, up to date further minimizes the risk of exploitation.

The protective measure of setting firewalls and security policies in your web environment is provided by the tools cPanel offers through ModSecurity. The firewall protects against SQL injection and cross-site scripting attacks, thus effectively reducing security threats.

Your server’s security status needs constant monitoring through tools found within cPanel that help you identify potential vulnerabilities so you can resolve them before they turn into serious issues. Regular scans ensure that your system remains secure and swiftly neutralizes any threats.

The security advisor within cPanel generates custom user recommendations according to their setup configuration. These security mechanisms provide tailored recommendations to help you resolve possible security issues so your web environment stays resilient against various threats. The combination of the tools and practices provided inside cPanel offers enhanced security for web hosting platforms.


Speed and Efficiency in cPanel

Utilizing Automation Features

cPanel’s automation features are designed to simplify your workflow by automatically handling routine tasks. You can schedule scripts and commands to run at specified intervals using the Cron Jobs feature.

Without manual interference, this function helps users perform repetitive tasks such as clearing cache gen, creating backups, and running updates for consistent execution.

Take time to investigate the numerous plugins that increase cPanel’s automation functionality. Friends plugin technology integrates cPanel functions with external platforms and automates intricate operations while extending cPanel base capabilities.

For example, plugins can automate data synchronization between different applications or streamline email marketing campaigns.

Another powerful tool within cPanel is the ability to set up automated backups. Company data backup automation delivers information protection through automated systems that eliminate supervision duties, decrease data loss probability, and ensure security measures.

Server maintenance automation is made possible through the built-in options available in the cPanel interface. Features like automated updates ensure your software remains current, minimizing vulnerabilities and enhancing security. Automating these web environment updates eliminates the need for manual release tracking, delivering safer and more reliable performance.

Running automated alerts together with notifications provides a vital benefit to your system. Automating the delivery of email or SMS alerts for important system events will enable you to deal with critical issues before they become significant problems. The preventative maintenance strategy allows you to preserve uninterrupted web environment operations.

When your team uses cPanel automation tools, they will save valuable time on routine procedures, allowing members to focus on the critical work that drives website success.