How Hosting Location Influences Content Control and Privacy
When choosing a web hosting provider, most people consider speed, uptime, and price. But there’s another critical factor that’s often overlooked — location.
Where your server physically resides has a significant impact on the laws that apply to your content, the data retention policies, and how easily your site could be subject to takedowns or censorship.
🌍 Why Hosting Location Matters
Every country enforces different internet regulations. Hosting in one region might grant you total freedom of speech, while another could impose strict takedowns or surveillance.
For example:
United States: Strong DMCA enforcement can result in swift content takedowns.
European Union: GDPR protects your privacy, though some countries enforce copyrights more strictly.
Netherlands / Iceland: Renowned for data neutrality and lenient content policies.
Bulgaria: Known for neutral hosting laws and strong privacy tolerance—perfect for sensitive projects.
🚫 Content That Is Often Affected
Depending on the region, the following types of content may face restrictions or takedowns:
Streaming or media services
News or activist journalism
Adult or controversial content
Open-source archives
Cryptocurrency/blockchain platforms
Political or whistleblower channels
In such cases, selecting the right jurisdiction can be the deciding factor between staying online and being taken down.
⚖️ Comparing Hosting Jurisdictions
Region
Known For
Risk of Takedown
🇺🇸 United States
Fast internet, strong DMCA enforcement
High
🇩🇪 Germany
GDPR-protected, strict on copyright
Medium
🇳🇱 Netherlands
Data neutrality, privacy tolerance
Low
🇮🇸 Iceland
Free speech protections
Low
🇧🇬 Bulgaria
Privacy-tolerant, neutral laws for sensitive content
Low
OffshoreDedicated.NET operates privacy-optimized infrastructure in Bulgaria, which helps support sensitive or controversial content with stronger legal protections.
🎯 How to Choose the Right Hosting Location
Here are the questions to guide your choice:
Does your content risk violation of local laws?
Is user privacy a key priority?
Are you creating sensitive or controversial material?
Do you need protection from legal or political overreach?
If your work involves streaming, alternative media, or risky content, consider:
Servers located in privacy-friendly jurisdictions like Bulgaria
Anonymous streaming-optimized servers hosted in undisclosed locations, designed for high bandwidth delivery and resisting takedowns
OffshoreDedicated.NET offers both, including Streaming Dedicated Servers located outside standard enforcement zones, tailored for high-bandwidth, privacy-centric use.
🔐 Final Thoughts
Hosting is not just about uptime or hardware — it’s a strategic choice.
By choosing the right location, you’re protecting not just your site’s availability, but also your freedom, audience trust, and peace of mind.
How to Keep Your Identity Private When Hosting Online
In today’s digital landscape, privacy is more important than ever. Whether you’re a whistleblower, journalist, activist, or just a privacy-conscious individual, hosting a website without exposing your identity is entirely possible — and easier than you might think.
This guide walks you through the essential steps for setting up your online presence while keeping your personal information protected.
🔒 1. Use Privacy-Respecting Domain Registrars
Start by registering your domain name through a provider that supports WHOIS privacy protection or anonymous registration. Some registrars allow you to pay with cryptocurrencies or do not require verification beyond an email.
Some privacy-respecting providers — like OffshoreDedicated.NET — allow for anonymous domain registration and accept alternative forms of payment such as crypto.
💳 2. Pay Anonymously
If privacy is a top concern, choose payment methods that don’t reveal your identity:
Cryptocurrency (like Bitcoin or Monero)
Gift cards or virtual credit cards
Privacy-focused payment gateways
OffshoreDedicated.NET supports multiple such methods including crypto for privacy-conscious users.
🌐 3. Choose a Host That Respects Privacy
When selecting a hosting provider:
Avoid hosts that require government-issued ID
Look for providers who clearly state what data they log (and for how long)
Prefer offshore jurisdictions with strong privacy laws
For example, OffshoreDedicated.NET specializes in such environments where privacy is a core principle.
📧 4. Create Burner or Encrypted Email Accounts
Always use separate, private email addresses for your hosting and domain services. Secure providers like ProtonMail or Tutanota offer good encryption and do not log IP addresses.
🧰 5. Secure Your Site and Connection
Use HTTPS with a trusted SSL certificate
Install security plugins (if using CMS like WordPress)
Avoid leaking information via your CMS metadata or analytics tags
👣 6. Don’t Leave Digital Breadcrumbs
Avoid using your real name or contact info in:
Domain WHOIS records
Website footers or “About” pages
Admin user profiles or file metadata (like image EXIF data)
🛡️ 7. Enable DNS Leak Protection and Use VPN
Even with all the above steps, using a reliable VPN or proxy service can help mask your original IP while you manage your website.
🎯 Final Thoughts
Anonymity online requires thoughtful planning, but it’s completely achievable. By making informed choices about how you host and register your site, you can significantly reduce your exposure while maintaining full control of your online presence.
Web hosting utilises control panels to ease all the server and website administration processes. Web hosts can use these interfaces to operate servers efficiently while avoiding deep technical expertise requirements.
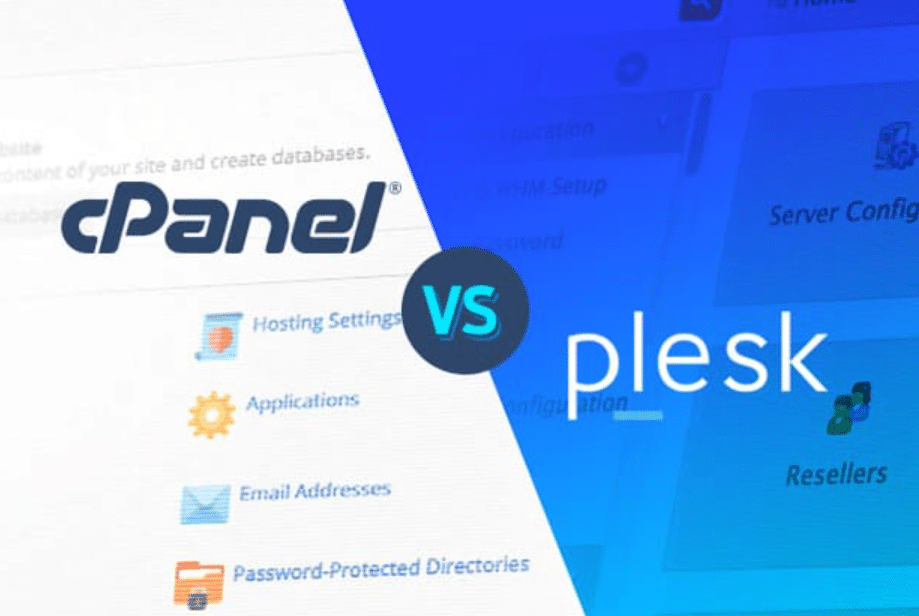
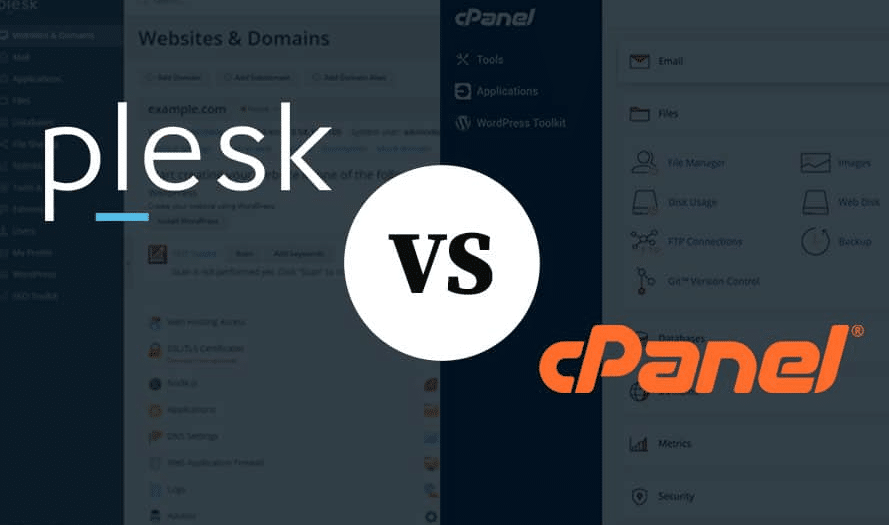
The abundant range of control panels features two major options, which are cPanel and Plesk, because of their popularity and comprehensive feature capabilities.
Many users select cPanel since it offers dependable service and a wide selection of capabilities. Users benefit from central dashboard management of databases and email accounts together with file management through the user-friendly cPanel system.
The hosting software Plesk continues to make strong inroads against other alternatives. Plesk enables users to control websites through its modern and adaptive user interface, which functions across Linux and Windows. The tool provides an extensive collection of extensions that enable users to boost capabilities through additional features according to their web hosting requirements.
The selection between these control panels mostly depends on particular operational requirements along with user preferences. Some users who desire a contemporary system interface choose Plesk, yet traditional cPanel users tend to keep using their familiar layout. Each control panel includes characteristics which make it appropriate for distinct user types and different hosting setups.
Fundamental knowledge about the distinctive features of cPanel and Plesk depends on making a proper selection between them. The understanding of these features proves useful when planning to shift between cPanel and Plesk, since it supports your migration preparation and delivery of a better user experience.
Preparing for Migration
Before switching from cPanel to Plesk, ensuring you have a comprehensive backup of all your website files, databases, and email accounts is paramount. Safety measures play an essential role in preventing data loss that may occur during the transfer process.
Before migration, check that your server matches Plesk system specifications requirements. The successful operation of your system depends on verifying software version compatibility. Updating all server components to their latest versions is a recommended step to facilitate a smoother migration.
Also, evaluate your current hosting environment. Take note of any custom configurations, scripts, or applications you are using on cPanel, as these may need adjustments or replacements in Plesk. Understanding these details will help you anticipate and address any compatibility issues.
In addition to technical preparations, familiarise yourself with the Plesk interface and features. A basic understanding of Plesk’s layout and tools can make the migration process less daunting. Learning Plesk becomes easier by using its comprehensive documentation resources for assistance.
Your transition to Plesk becomes more fluid when you take time to prepare before the changeover thoroughly.
Migration Process
Plesk’s Migration and Transfer Manager is an efficient tool for automating the transition from cPanel. This user-friendly tool helps transfer website content, email accounts, and databases seamlessly. Before starting, ensure you have prepared your cPanel data for migration, including backups and system checks.
To use the Migration and Transfer Manager, first, log in to your Plesk control panel. Navigate to the Extensions section and install the Migration and Transfer Manager. Once installed, open the tool and follow the prompts to connect your cPanel account. You must provide your cPanel credentials and the source server’s IP address. The tool will then scan your cPanel account to identify the data available for transfer.
The migration process allows you to choose particular websites and email accounts and databases you want to transfer. The selective method separates required components from unnecessary ones, allowing you to migrate essential items first.
For a more hands-on approach, manual migration involves exporting website files, databases, and email accounts from cPanel. Use the cPanel Backup Wizard to create full backups of your websites and databases.
Download these backups to your local system and upload them to your Plesk server. In Plesk, use the Backup Manager to restore these files and databases. Ensure your DNS settings are updated to point to your new Plesk server to avoid service interruptions.
During the migration period, you must closely track the procedure to detect possible problems that may emerge. When encountering problems, Plesk provides detailed documentation together with support resources for users to resolve issues. Maintaining proper control of the migration process results in streamlined system integration that prevents disruptions in your web hosting services.
Post-Migration Tasks
After migrating from cPanel to Plesk, ensuring your new environment is running smoothly is crucial. Begin by verifying that all your files, databases, and email accounts have been transferred correctly. This involves comparing the transferred data in Plesk with your original data to confirm that nothing was missed or corrupted.
Next, thoroughly test your website to ensure everything is functioning as expected. Navigate through all the pages, check forms, and ensure there are no broken links. If you have applications or scripts running on your site, test these to confirm they are working correctly in the Plesk environment.
In addition to website functionality, ensure your email accounts are operating without issues. Send and receive test emails to verify that your mail settings and emails are correctly processed.
It’s also important to check your DNS settings. Ensure that your domain names are pointing to the correct Plesk server to avoid any service disruptions. Update any necessary records to reflect the change.
Review your server settings and configurations in Plesk. Adjust any settings that might have changed during the migration to match your previous setup on cPanel. Users should review every customisation and schedule, as well as security settings for the server platform.
Plesk provides monitoring tools that should be used to evaluate server performance and resource consumption. Scheduled performance checks through monitoring will help you discover issues in advance to maintain your hosting system stable and efficient.
Troubleshooting Common Issues
When migrating from cPanel to Plesk, you may face several common issues that can disrupt the process. Compatibility problems are a frequent challenge, mainly if your website uses specific scripts or applications that Plesk does not support. To resolve this, refer to Plesk’s documentation for compatible alternatives or solutions.
Configuration differences between cPanel and Plesk can also lead to error messages during the migration. These errors involve database connections, file permissions, or other server settings. Carefully read error messages and consult Plesk’s knowledge base to understand the cause and solution.
DNS issues can arise if your domain names are not correctly pointed to the new Plesk server. Ensure that all DNS records are updated and verify that they are correctly configured to prevent service interruptions.
Double-check the migration logs for any skipped items if you notice discrepancies in data after migration, such as missing files or emails. You should manually transfer these components to ensure a complete migration.
Performance issues could also be a concern. Post-migration, monitor your server’s performance and resource usage. Use Plesk monitoring resources to solve performance issues if your system shows slow response or other operational problems. Responsible resources need to be adjusted or configurations require updates if they exist.
Lastly, permission issues can occur, affecting access to files and directories. Ensure user permissions are correctly set up in Plesk to match those from your cPanel environment. This step is crucial for maintaining security and functionality.
By addressing these common issues proactively, you can help ensure a smoother transition from cPanel to Plesk. Use Plesk’s support resources for additional help as needed.
Maximising Plesk Features
After completing your migration to Plesk, it’s time to explore its robust feature set to maximise your server’s potential. One of the first things you can do is customise the Plesk interface to align with your workflow and preferences. Personalisation options for dashboards greatly improve user experience because they reduce the time needed to complete daily activities.
Now examine the wide selection of Plesk extensions which are available at your disposal. Server functionality grows considerably with the installation of available extensions.
The system allows you to implement high-end security capabilities to defend your information while including performance optimisation resources that guarantee website stability, besides interface improvements to simplify workflow operations. Security extensions immunify360 represent one category among popular Plesk selections with Nginx and redis performance utilities in addition to backup tools available for users.
Through Plesk users can manage multiple domains together with their websites through one central control panel interface. The centralised management interface is handy to users who run multiple projects or client sites because it makes process handling more efficient and saves them time.
Plesk functions as a versatile web development platform because it supports different programming environments and multiple coding languages. Users can establish and operate PHP, Node.js, Ruby and additional development environments using the built-in functionality. The platform provides adaptable settings to enable work with favourable development tools matching project needs.
The key aspect of Plesk is that it enables managers to handle WordPress sites through its integrated WordPress toolkit, which provides all-in-one tools. The system includes automated update functionality, cloning capabilities, and staging features, allowing for smooth WordPress site management.
The security features available in Plesk enable you to secure your server and websites. Perform data protection through the firewall system alongside fail2ban intrusion prevention and antivirus security tools built into Plesk.
By utilising these features and extensions, you will maximise your server performance and security while making your website management more efficient after transitioning to Plesk.
In web hosting, cPanel and WHM (Web Host Manager) are popular tools for managing servers and websites. While their graphical interfaces simplify many tasks, understanding and utilising Linux commands can significantly boost your server management capabilities.
Linux commands allow you to perform actions directly via the command line interface, providing more control and flexibility over your server environment. You can accomplish efficient multi-server management through cPanel/WHM, utilising necessary Linux commands according to the guidelines. Server management tools function with basis commands that perform critical duties for file handling and system observation.
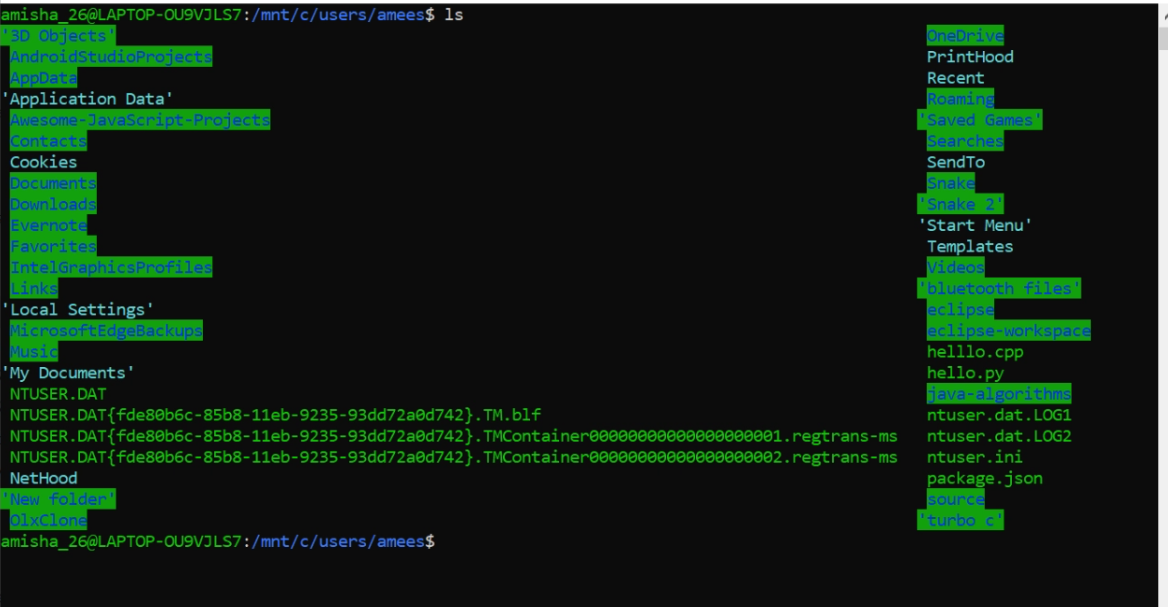
Basic File Management Commands
File management is a crucial skill when working with any server. The ‘ls’ command is your go-to for listing directory contents. This interface enables fast access to view files and directories, which lets you handle them efficiently.
The ‘cp’ command allows file copying while ‘mv’ serves as the file mover for your system. Your server’s file system requires both commands to achieve effective management. If you need to remove files, the ‘rm’ command lets you delete them. However, be cautious as this action is irreversible and can potentially lead to data loss if misused.
Navigating the File System
Navigating the file system is essential for efficiently managing files and directories on a Linux-based server. Using the ‘cd’ command, you can change directories to move through different parts of the file structure. For instance, ‘cd /home’ takes you to the home directory, while ‘cd ..’ moves you up one directory level.
To always know your current location within the directory structure, the ‘pwd’ command will come in handy. The command displays the entire directory path where you are located to keep you oriented throughout your navigation. The ‘mkdir’ command helps users create new directories, but users can remove empty directories easily with ‘rmdir’.
For viewing the contents of a directory, the ‘ls’ command is indispensable. With options like ‘-l’ for a detailed list or ‘-a’ to include hidden files, ‘ls’ gives you a comprehensive view of what’s in your current directory. These navigation commands are foundational for managing any Linux-based server environment effectively.
Permission and Ownership Commands
Linux is designed as a multi-user system, so properly managing file permissions and ownership is essential. The ‘chmod’ command is instrumental in modifying file permissions, determining who can read, write, or execute a file. Proper use of ‘chmod’ ensures that only authorised users can access or modify sensitive files, thus maintaining server security and data integrity.
Files and directories can change their ownership through the execution of the ‘chown’ command. The command enables file assignment to specific users or groups for correct access rights distribution. For instance, ‘chown user:group filename’ changes the specified file’s owner and group, adapting it to your administrative needs.
Another useful command is ‘chgrp,’ which changes the group ownership of a file or directory. The command enables excellent management of group file access for collaborative teams.
Knowledge about various permission types constitutes one fundamental concept in Linux handling. Under the Linux operating system read (r), write (w) and execute (x) permissions structure different system elements into three separate categories. These permissions are assigned to three classes of users: the file owner, the group, and others. For example, a file with permissions set to ‘rwxr-xr–‘ allows the owner to read, write, and execute the file, the group to read and execute, and others only to read it.
Additionally, special permissions like Setuid, Setgid, and Sticky Bit offer advanced control over executable files and directories. Setuid allows users to run an executable with permission from the executable’s owner. Setgid applies similar rules but for group permissions. The Sticky Bit directory function enables administrators to restrict file deletion to authorised users only because users can delete only their files.
You can maintain server security while achieving organisational excellence through practical command applications and mastering their implementation.
Managing Processes and System Resources
Process and system resource management is a critical practice for sustaining server health and performance. Use the ‘ps’ command to obtain an instant report about running processes, along with their process IDS, user data, and CPU resource usage. The provided information enables you to check running processes and detect resource-demanding programs.
When you encounter an unresponsive or unnecessary process, the ‘kill’ command allows you to terminate it. By specifying the process ID, you can stop the problematic process without affecting others. For example, ‘kill 1234’ would terminate the process with ID 1234. If a process doesn’t respond to a standard kill command, ‘kill -9’ forcefully stops it.
For real-time monitoring, the ‘top’ command is invaluable. Any system resource information gets displayed in real-time, including CPU usage, memory use, swap activity and running processes.
Through live system resource updates, you can rapidly discover performance obstacles while performing appropriate remedies. A better interface from ‘htop’ makes it easy to interact with system processes and execute interface-based operations on these processes.
Understanding memory consumption levels can be achieved through running the ‘free’ command because it shows how much RAM is available and used versus free capacity. Your server requires a proper memory capacity evaluation before you deploy it to support current needs and upcoming system loads.
A server administrator can assess filesystem disk capacity with the ‘df’ command, which displays disk usage amounts and free storage levels. This command lets users view storage capacity levels to avoid running out of disk space. Through ‘du’ command execution users gain comprehensive data showing disk space allocation per file type and directory to identify storage space utilizers.
Uptime summarises server operation time alongside system load average data that reflects server stability.
Networking and Security Commands
Server management depends heavily on networking alongside security features for its successful operation. Network connectivity problems can be diagnosed through the ‘ping’ command, which sends packets to a particular IP address and detects response-time performance. The command allows users to identify delays on the network and possible connectivity problems.
You can use ‘ifconfig’ as a command to display comprehensive network configuration information, which includes all settings on IP addresses, subnet masks and other aspects. The system allows administrators to turn network interfaces on or off through its interface.
The system administrator relies on the ‘netstat’ command to examine network statistics while monitoring current connections. Using ‘netstat’ allows users to view the active connections with listening ports and routing tables for networking diagnosis.
For security purposes, ‘iptables’ provides a practical utility to create firewall rules. This utility lets you establish traffic flow rules for both incoming and outgoing traffic to strengthen the security position of your server. Security needs determine how you shape firewall rules by blocking and allowing IP addresses, protocols, and ports.
The ‘ss’ command now acts as the current version of ‘netstat’ to deliver extensive details regarding socket statistics. Through this command, users can evaluate network connections while they resolve system issues.
‘ssh’ (Secure Shell) is a must-know command for secure remote server access. The encryption system safeguards the exchange of messages between client devices and servers that occur during the transmission. Secure execution of remote commands, safe file transfer, and protocol tunnelling form part of the SSH tool’s secure functionality.
To monitor for unauthorised access attempts, the ‘last’ command lists the most recent successful and failed login attempts. The system enables you to monitor server access and detect abnormal behaviour.
Fail2ban operates as a beneficial tool which automatically blocks IP addresses that display harmful behaviours, including multiple failed login attempts. The implementation of fail2ban provides your server with a supplemental protection system.
Conclusion and Further Learning
Mastering Linux commands can significantly improve your server management skills within cPanel/WHM. Learning essential keyboard commands enables users to enhance their file management while they navigate the filesystem, along with permissions, process management and network security features. These initial abilities maintain both operational efficiency and server security.
Your educational process should include investigations of online tutorials and forums, along with program documentation. Users can access helpful solutions and information regarding common issues through the Linux communities and programming platforms Stack Overflow, GitHub and others.
Users who want to stay informed about the latest server management tools and best practices should subscribe to newsletters and blogs on Linux topics.
You need to practice commands in Linux to master the operating system. Setting up a test environment or using virtual machines can provide a safe space to experiment without risking your production server. Many online platforms offer free or low-cost virtual lab environments tailored for learning Linux and server management.
Consider taking formal courses or certifications to deepen your knowledge and validate your skills. Organisations like the Linux Foundation, Comptia, and Red Hat offer certifications that are well-respected in the industry and can enhance your professional credentials.
Engaging with local or online tech communities can also provide support and networking opportunities. Professional communication with experts about Linux server management becomes possible through active participation in discussions alongside meetings or membership in special interest groups.
By maintaining continuous practice alongside learning, you will gain the confidence required to manage your server environment, guaranteeing both efficiency and security and organisational structure.
Before you start with DirectAdmin, proper preparation will make the process much smoother. Begin by verifying that your server meets all requirements.
DirectAdmin supports multiple Linux distributions, including CentOS, Debian, and Ubuntu. Check that your server’s operating system is current and that you have root access. This is essential for both installation and configuration tasks.
Create a checklist of the software and hardware prerequisites for DirectAdmin. The required specifications for installation consist of precise CPU, RAM, storage capacity recommendations and precise software package requirements.
The specified list of requirements protects you against installation problems. Data backup procedures should remain a vital precaution before any system installation. Should anything go wrong, a recent backup will allow you to restore your server without losing data.
Next, assess your network settings. Ensure that your network configuration will allow DirectAdmin to function properly, and that necessary ports are open. You may need to adjust your firewall settings at this stage, but detailed firewall configuration will be handled later.
Additionally, you should gather any relevant license information for DirectAdmin. Make sure you have your license key ready, as it will be required during the installation. Without this key, you won’t be able to complete the setup.
You should also prepare any custom settings or preferences you plan to implement. Whether specifically server configurations or unique software installations, having these details outlined beforehand will streamline the process. This planning will help you ensure that your DirectAdmin setup meets your specific needs and requirements.
Finally, familiarize yourself with the DirectAdmin documentation. Understanding the various options and settings available will make the configuration process more efficient. Documentation usually provides essential information about troubleshooting methods along with best practices to help installation advancement.
Your groundwork creates conditions for a successful DirectAdmin installation process. Pre-installation preparation reduces mistakes and allows you to perform the next steps with increased skill and speed.
Initial Setup Steps
Once the preparatory steps are completed, download the DirectAdmin installation script from the DirectAdmin website. Ensure you select the correct version that is compatible with your operating system and server specifications. The script is the key component for initiating the installation process.
After downloading, it’s crucial to execute the script with the proper permissions. Root or superuser access is typically required to run the script effectively. You may encounter errors or an incomplete setup if the script is executed with insufficient permissions. Follow the detailed instructions provided by DirectAdmin to ensure the installation script runs seamlessly, setting up the essential framework for your control panel.
Next, the installation script will prompt you to enter various details, such as your license key. Make sure you have this information readily available, as it is required to proceed with the setup. The script will automatically configure certain settings based on your input, so double-check all entries to prevent any configuration issues.
During the script execution, several software packages and dependencies will be installed. These components are necessary for DirectAdmin to function correctly. Allow the script to complete this process without interruption. Any missing packages will be automatically retrieved and installed, ensuring your server meets all the prerequisites for running DirectAdmin.
Once the script has finished, DirectAdmin should be installed on your server. At this point, you’ll receive login details for accessing the DirectAdmin control panel. Use these credentials to log in and begin the configuration of your new control panel.
Before making any further adjustments, verify that the installation was successful by checking the status and functionality of DirectAdmin. If errors or warnings exist, refer to the DirectAdmin documentation or support resources for troubleshooting steps.
With the initial setup completed, you’re now ready to move on to configuring essential components and fine-tuning your DirectAdmin environment to suit your specific needs. The proper completion of initial setup procedures provides your DirectAdmin control panel with a strong base, which results in an effective server management experience.
Configuration Essentials
After installing DirectAdmin, you must configure several key components to ensure your server operates effectively. Proper firewall settings are essential for protecting your server from unauthorized access and potential security threats. Confirm that the necessary ports for DirectAdmin are open and correctly configured.
Setting up DNS records is another critical step. DNS configuration allows your domain names to be resolved accurately, ensuring that your websites are accessible to users. DirectAdmin provides tools to help you manage DNS records efficiently. Verify that your DNS settings are accurate and working as expected to avoid any accessibility issues.
Next, configure your email settings. DirectAdmin includes email server functionalities, allowing you to create and manage email accounts. Ensure that your email server settings are correctly configured to support your domain names. Properly set up MX records to ensure email deliverability and configure anti-spam measures to protect your users from unwanted emails.
Database configuration is also crucial. DirectAdmin supports various database management systems like MySQL and MariaDB. Set up your databases and ensure they are optimized for performance. Create necessary user accounts with appropriate permissions to manage your databases securely.
Another important aspect is setting up user accounts and permissions. DirectAdmin allows you to create different user levels, such as admin, reseller, and user. Set up your accounts based on need and determine permission settings to achieve server security alongside the organization.
Lastly, configure backups. The protective nature of regular backups becomes vital because unexpected server issues demand data recovery. The backup features within DirectAdmin help you execute automated backup operations easily. Set up a regular backup schedule and ensure that your backups are stored securely, either locally or remotely.
By addressing these configuration essentials, you can optimize your DirectAdmin setup for efficient and secure server management.
Security Measures
When managing your DirectAdmin server, implementing robust security measures is vital. One of the first steps is to set up firewalls and ensure that only necessary ports are open. This minimizes exposure to potential threats and restricts access to critical services.
Using strong, unique passwords for all user accounts is another essential practice. Consider enabling two-factor authentication (2FA) for added security. 2FA requires users to verify their identity using a secondary device or method, significantly reducing the risk of unauthorized access.
Regularly updating your system is crucial for maintaining security. This includes DirectAdmin, your server’s operating system, and any installed applications. Security patches and updates are frequently released to address vulnerabilities, so staying current is essential for protection against exploits.
Another important security measure is configuring secure access protocols. Use SSH (Secure Shell) instead of Telnet for remote server access, as SSH encrypts data transferred between your server and the client. Additionally, disable root login via SSH to reduce the risk of brute force attacks. Instead, create a separate user with sudo privileges for administrative tasks.
Regular checks of server logs represent a wise step for maintaining security. Server logs give you beneficial information about possible security vulnerabilities along with unusual system events.
You should set up automated alert systems that will notify you about any abnormal activities, such as multiple rejected login attempts or unauthorized access attempts.
For email security, ensure that your mail server settings include proper authentication mechanisms such as SPF (Sender Policy Framework), DKIM (DomainKeys Identified Mail), and DMARC (Domain-based Message Authentication, Reporting, and Conformance). Email domain defenses implemented in your system reduce the chances of phishing and spam attacks.
Security audits as part of a standard routine represent the final step in your protection measures. Your security posture receives improved identification of weaknesses and development areas through regular audits. Use vulnerability scanners to evaluate your server before taking recommended solutions based on identified results.
By implementing these security measures, you will substantially protect your DirectAdmin server, defend data, and create a secure space for users.
Testing and Verification
With your DirectAdmin setup nearly complete, thorough testing is necessary to ensure everything is running smoothly. Begin by logging into the DirectAdmin interface and navigating through its various sections. Check for any error messages or signs of misconfiguration.
Proceed by creating a few test user accounts and ensuring they can log in and access their designated features. This includes verifying that users can manage files, databases, and email accounts without issues.
Also, it tests the functionality of creating and hosting websites. Set up a sample website and ensure it is accessible via its domain name. Make sure DNS records resolve correctly and that the website loads as expected.
Verify email functionalities by sending and receiving test emails. Confirm that email delivery is prompt and that there are no issues with spam filters or authentication mechanisms such as SPF, DKIM, and DMARC.
Additionally, test your backup procedures by running a manual backup and checking the integrity of the backup files. Ensure that you can restore the data from these backups without any errors.
Review your firewall and security settings to confirm they are operating as intended. Conduct a few simulated attacks, like attempting unauthorized logins, to verify that your security measures are effective.
Lastly, monitor server performance and resource usage. Ensure that the server handles the load efficiently and that there are no unexpected spikes in CPU or memory usage.
By conducting these tests, you can identify and resolve issues early, ensuring a robust and efficient DirectAdmin environment.
The Domain Name System functions as a fundamental Internet element by providing a service similar to an Internet phone directory. DNS functions as a web navigation system because it transforms accessible domain addresses into machine-readable IP addresses to simplify online browsing.
Imagine remembering a string of numbers to access your favourite website instead of a simple name; DNS eliminates that burden.
When users type www.example.com, DNS converts the domain name to an IP address, resulting in the computer receiving the IP address 192.0.2.1 for internet location purposes.
DNS performs its conversion process by using multiple steps involving different types of DNS servers to provide essential functions during operations. Your computer first queries a DNS server, which may then communicate with other servers to find the required IP address.
Without DNS, browsing the internet would be cumbersome and inefficient, requiring users to remember numeric IP addresses for every site they wish to visit.
A user-friendly interface enables IT experts and ordinary users to access internet resources through the DNS system. The behind-the-scenes work of DNS happens so quickly and seamlessly that most people aren’t even aware of its role, but it is indispensable for the smooth operation of the internet.
How DNS Works
Understanding DNS operation requires knowledge about the functions of domain names together with IP addresses. When you type a domain name into your browser, DNS maps it to the corresponding IP address.
The DNS resolution process involves multiple actions. Initially, your computer sends a query to a DNS resolver, a server designed to handle such requests. If the resolver has the needed information cached, it responds immediately.
If not, it forwards the query to a root server. The root server doesn’t have the exact answer but directs the query to the relevant Top-Level Domain (TLD) server based on the domain extension, like .com or .org.
The TLD server then points to the authoritative server for the specific domain. This authoritative server holds the IP address for the requested domain name. Once found, this IP address is sent back through the chain: from the authoritative server to the TLD server, then to the root server, and finally back to your computer via the DNS resolver. This process happens in milliseconds, making it nearly invisible to the user.
Each type of server in this chain plays a distinct role. The resolver serves the first query needs while storing commonly requested answers for improved resolution speed. Root servers are primary reference points, while TLD servers manage domain-specific queries. Authoritative servers store the definitive IP addresses for domain names.
DNS achieves continuous website accessibility through its distributed domain name resolution network, removing users’ need to remember IP addresses. System caching tools embedded in DNS implementation improve online performance through performance optimization.
Types of DNS Servers
A DNS server operates across multiple configurations that fulfil individual positions during domain name resolution operations. Root servers act as the starting point, directing queries to the appropriate Top-Level Domain (TLD) servers based on the domain extension, like .com or .org. TLD servers then forward the queries to authoritative servers, which hold the actual IP addresses for the domain names.
Another essential type is the caching server, a DNS resolver. The temporary storage capabilities of these servers minimize the resolution time for repeated domain requests while simultaneously decreasing server workload. Internet performance improves substantially due to DNS queries being stored temporarily.
The different DNS servers exist to carry out designated resolution tasks, which enable an effective operation of the entire system. Root servers provide the initial direction, TLD servers manage domain-specific queries, and authoritative servers store definitive IP addresses. Applying caching servers enables faster and more efficient queries because they store frequently requested information for subsequent requests.
Common Uses of DNS
DNS functions for multiple purposes that extend past the domain name relation to websites. DNS server functions provide the necessary elements to understand the complex and efficient operation of the DNS system. Without DNS, sending an email would be far more complex, as it would require knowing the specific IP address of the recipient’s mail server.
DNS enables email packet routing and supports various online service delivery functions. Network services rely heavily on DNS because virtual private networks (VPNs) and content delivery networks (CDNs) depend on it to minimize delays when selecting servers and managing network traffic. The setup design enhances system reliability while accelerating operations, thus producing improved user performance.
Online gaming platforms also depend heavily on DNS. Gamers must connect to game servers quickly and reliably, and DNS helps route these connections. Online gaming performs best with DNS queries because they control both system performance speed and latency.
Server traffic allocation serves an important purpose of DNS that involves distributing user requests to different servers. The feature in the system distributes user requests across different servers to maintain high website performance without server overload.
Internet of Things (IoT) devices link up with DNS through an additional application of this technology. Such devices need to connect to different services and servers for proper functioning. DNS serves as an important operating system for IoT devices which guides them to secure network connection points.
Web-based systems utilize DNS’s domain name to IP address resolution functionality which strengthens application communication processes. Reliable internet communication supports the operation of APIs, microservices, and additional components that need internet-based communication.
The network troubleshooting process and diagnostic operations heavily rely on DNS functionality. Administrators benefit from using the Domain Name System to execute traceroute and ping tools for hostname-to-IP address lookups, which help them tackle connectivity problems.
DNS plays a central role beyond website connection as an essential component of multiple internet functionality aspects. It performs essential operational tasks that optimize online systems running with their linked applications.
Security Concerns
DNS systems face multiple security threats that endanger the effectiveness of internet security systems. Attackers perform DNS spoofing through altered DNS data routing, which diverts users to deceitful web pages. This technique spoofs DNS data, making attacks on data systems, financial damage, and malware infections possible.
DNSSEC (DNS Security Extensions) is essential for fighting these safety threats. DNSSEC enhances security by adding digital signatures to DNS responses, thus providing reliable and authentic data transmission. The added security layer prevents unauthorized modification as it verifies that users are directed to official web destinations.
Additionally, regularly updating DNS server software is essential. DNS software remains protected from exposure through security updates that deliver needed security patches for all possible attacks. Using updated DNS software diminishes the chances of security breaches through potential avenues.
Tracking network traffic for non-standard patterns can help identify threats in the early stages. Unusual spikes in traffic or unexpected DNS queries can indicate malicious activity. Monitoring tools combined with regular auditing procedures can quickly identify such anomalies.
System protection measures should include firewall deployments together with IDS as devices to boost security standards. Tools deployed by organizations obstruct unauthorized access while creating alert systems that help administrators spot suspicious activities to strengthen DNS security.
DNS security best practices need to be taught to both end-users and administrators. Organizations can stop social engineering attacks through staff training because these attacks deceive employees into altering their DNS configurations or visiting harmful online content. An organization achieves better DNS infrastructure protection by creating a security culture environment.
DNS functions as an internet necessity yet requires strong security protocols that protect against new operational threats.
Conclusion
Internet users depend on DNS to automatically transform human-readable URLs into computer-processable IP addresses. We can easily obtain website access at high speed through the synchronized operation of a network of servers, including root and TLD and authoritative and caching servers; DNS maintains its function beyond web browsing because it supports email delivery, online gaming, N uses an,d IoT technology applications, making it essential for modern digital infrastructure.
Collaborating in DNS operational understanding along with domain study improves fundamental comprehension of what appears as an unimportant technology.
DNS security operates as an essential requirement that people should not overlook. DNS security depends on the combination of DNSSEC implementation, software updates, and network traffic monitoring because these steps safeguard against DNS spoofing attacks.
DNS security obtains critical strength through educational training practices. All users, together with administrators, need information about proven security methods that block unauthorized system access and social engineering tactics. The strength of DNS operations increases through the integration of firewalls with intrusion detection systems while requiring regular audits.
The smooth operation of the internet depends entirely on DNS because it enables all online services, including casual browsing and critical functions. Digital security improvements become possible when we comprehend DNS’s mechanisms and value its security function.
The command-line functions of EasyEngine present users an easy method to operate WordPress website functions. EasyEngine performs both server administration tasks and executes entire deployment procedures for website release which makes it essential for web administrators.
The interface of EasyEngine makes WordPress site management simple because it combines an intuitive design with powerful features that enable simplified control over multiple sites and decrease both operational time and mistakes. With EasyEngine, you can quickly set up Nginx, PHP, MySQL, and other essential components with a single command.
The advanced management tools found in EasyEngine enhance your WordPress website performance, including SSL security, caching, and protection features.
The containerized Docker approach merges with Docker to create regularized environments that make scalability easier. The configuration capabilities in EasyEngine extend to a wide selection of plugins that users can set up according to their needs.
Security and data integrity remain vital features of EasyEngine, which mainly facilitates prompt WordPress site management. Users can perform successful backup and restore operations using the multiple options within this system’s feature package. A stable site needs security maintenance, which derives from a complete understanding of backup and restore implementation procedures.
For those new to server management, EasyEngine’s documentation and community support offer extensive resources to get you started. Learning EasyEngine enables users to efficiently control their sites by improving their workflow regardless of handling multiple or single locations. Properly implementing maintenance strategies defends your WordPress sites from data loss while preventing website downtimes.
Setting Up Automatic Backups
Configuring automatic backups in EasyEngine is straightforward. Begin by accessing your server’s terminal and entering the backup command specific to your version of EasyEngine. Typically, you would use a cron job to automate the process, ensuring your site data is regularly saved without manual intervention.
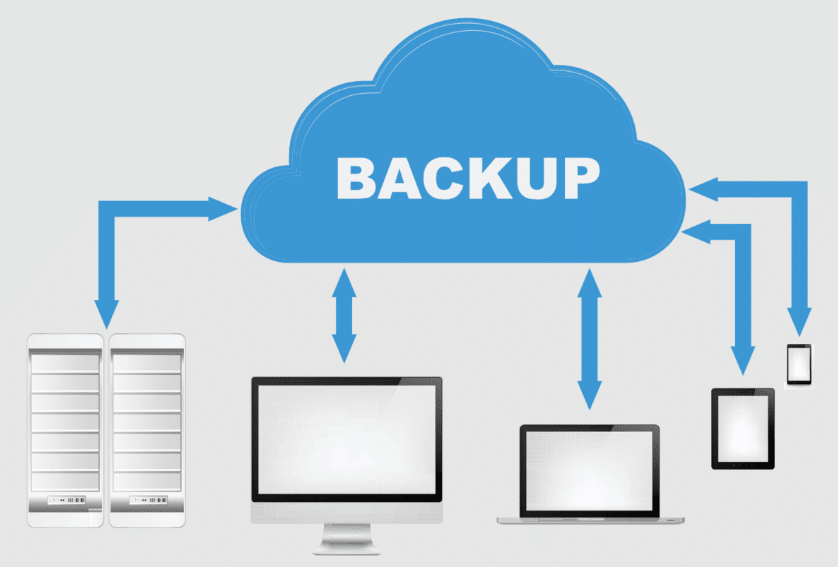
When setting up cron jobs, it’s essential to consider the frequency—daily backups are recommended for sites with frequent updates, while weekly may suffice for less dynamic sites. Ensure your backups are stored on a separate server or cloud service to prevent data loss if the primary server fails.
Manual Backup Techniques
A manual backup process should be conducted specifically before large changes occur to your website. Access your site’s directory in the terminal to perform a manual backup. The EasyEngine command `ee site backup example.com` will initiate the backup process for the specified site. For database-specific backups, tools like `mysqldump` can be highly effective.
First, navigate to your site directory using the terminal. Once there, execute the backup command. This command executes a complete backup operation that includes your site data as well as files and databases.
If you prefer to back up only the database, use `mysqldump -u username -p database_name > backup.sql` to export the database content. Make sure to replace `username` and `database_name` with your actual database username and name.
You must use compression techniques to optimize storage space and handle larger quantities of data while advancing as an organization leader. To compress the backup files, use commands like `tar -czvf backup.tar.gz /path/to/your/site.` This command creates a `.tar.gz` archive of your site’s directory, making it smaller and easier to transfer.
Before declaring the backup successful, you need to conduct a manual verification check of its completeness and accuracy. This verification can be done by extracting the backup and checking that all expected files and data are present. The command `tar -xzvf backup.tar.gz` will extract the contents of your compressed backup, allowing you to inspect them.
Regular manual backups serve as a reliable safety net, providing a fallback in case automated systems fail. Always store these backups securely, separate from your primary server. Storing additional data can be achieved by using external hard drives together with cloud solutions or a second server.
The described procedures will enable you to execute manual backup operations that protect your site data from unforeseen events.
Restore Processes in EasyEngine
Restoring a site using EasyEngine is straightforward and can be handled efficiently with the proper steps. To begin, locate the backup file you intend to use for restoration. This file should be stored securely on your server or a remote solution. You can start the restore process using the EasyEngine command `ee site restore example.com –file=backup.tar.gz,.` Make sure to replace `example.com` with your actual site name and `backup.tar.gz` with the name of your backup file.
Before you proceed, it’s crucial to ensure that your current site data is backed up, as the restore process will overwrite the existing data. This precaution helps prevent any loss of data that has been updated or added since the last backup.
During the restoration, EasyEngine will extract the backup file and replace your current site files and databases with those from the backup. The duration of this operation depends on your site size combined with the server’s performance capacity.
If you encounter any issues during the restoration, the first step is to check the server logs for any error messages. The main operating problems are file disappearance alongside database disorders. If the backup file itself is corrupted, the restore process will fail. To avoid this, it’s good practice to verify the integrity of your backup files regularly.
Tools like `MySQLcheck` can also help identify and repair database inconsistencies if you face database-related issues. Always ensure your backup file is complete and uncorrupted before attempting a restore.
If the restore process is successful, take the time to verify that your site is functioning correctly. Check various aspects of your site, including the front end and admin panel, to ensure that all data has been accurately restored.
Following these steps, and proper precautions, enables users to restore their WordPress site through EasyEngine and maintain data reliability while reducing service interruption.
Ensuring Backup Integrity
The reliability of your data depends heavily on protecting backup database authenticity. First, implement checksum tools like `md5sum` to verify that backup files remain unchanged during storage and transfer. Regular checks can help identify any alterations or corruption early on. It’s also advisable to perform trial restores periodically. These test restores should be done separately to avoid disrupting your live site.
Monitor your backup storage space closely. Locating backup storage that exceeds capacity can result in ruined backups that would create significant problems during site recovery.
To avoid this, regularly purge old or redundant backups. Label and organize your backup files clearly to ensure quick access when needed. The labeling system allows you to rapidly locate your backup files, making critical search times shorter when you need the most recent relevant backup.
Store copies of your backups in different physical or cloud locations to mitigate the risk of a single point of failure. For example, one set of backups can be maintained on an external hard drive and another in a cloud storage service.
Employing this strategy establishes several backup channels for data retrieval if one data storage option becomes inaccessible.
Start a regular practice of encrypting your backups regardless of the kind of information they contain.
Encryption technologies provide backup data with an additional defense mechanism that safeguards both storage and transmission processes against unauthorized access. Tools like `gpg` can quickly encrypt backup files.
You should document both your backup and restore procedures. Well-documented resources are an efficient guide to leading your team or yourself through the required emergency steps. Include information about backup schedules, storage locations, encryption keys, and specific commands or scripts.
Conclusion and Best Practices
Successfully managing WordPress sites with EasyEngine requires creating an extensive backup and restore procedure. Prioritize setting up automatic backups to ensure regular data protection and supplement this with manual backups before significant site changes.
Always store your backup files in multiple locations to guard against data loss from a single point of failure. Protecting sensitive information requires encryption to establish additional security coverage. Conduct regular integrity checks and trial restores to confirm that your backups are complete and functional.
Well-documented backup and restore procedures work as a reference tool when emergencies occur, thus allowing you to handle difficulties seamlessly. Implementing standardized best practices will improve WordPress site reliability and resilience, thus maintaining
Users and administrators frequently select Linux due to its secure and dependable nature. While its growing adoption as a server and cloud solution has increased its desirability for malicious actors, the platform remains safe and stable.
Security maintenance depends on a full understanding of how malware affects Linux systems. The Linux environment becomes vulnerable to attack when malicious code enters through malware, including viruses, worms, and trojans.
The growing cyberattack threat involves ransomware, which uses file encryption to demand payment before restoring access. Thanks to their stealthy features, attackers can access systems illegally through rootkits before systems detect them for long periods.
Thorough defense planning requires full awareness of threat methods and detection approaches. Staying alert for potential infections is essential since it allows you to detect threats that require specific preventive actions.
The security of the Linux system demands that users keep their software resources up to date, select appropriate protection tools, and set proper network protection parameters.
These protective measures must never be underestimated since they create the initial defense barrier against malware attacks. Users and administrators will succeed in safeguarding their systems from possible attacks when they apply best practices and understand malware threat dimensions.
Common Types of Malware on Linux
Linux systems, though generally secure, are not exempt from malware threats. The most common cyber threats include viruses, worms, and trojans. Viruses attach themselves to genuine programs and replicate when these programs are run.
Worms operate independently and spread across networks by exploiting security flaws. Trojans disguise themselves as legitimate applications but perform harmful activities once executed.
The Linux operating environment has become the target of active ransomware threats. Millicious programs attack computer systems by file encryption to extract payment for releasing files thus causing major operational breakdowns.
Rootkits present an enabling threat which gives unauthorized access to computers through hidden operations while providing attackers total system control. Attacks on compromised systems commonly use these tools for lasting unauthorized system access.
Botnets represent one category of malware that displays targeted actions against Linux systems. A botnet consists of compromised machine networks where a single entity executes control to launch attacks through Distributed Denial of Service (DDoS) campaigns. The surveillance features, along with information data theft abilities of spyware, affect Linux systems in comparable ways.
Adware is less common but still a threat, typically displaying unwanted advertisements and potentially collecting user data. Linux-based web servers possess the same susceptibility as web shells because scripts enable hackers to gain remote server control to conduct additional attacks.
A thorough security approach becomes essential because multiple malware attacks on Linux systems. People require proper security tools to evaluate and reduce threats, which enables them to stay alert.
Signs of Malware Infection
Users must be alert to abnormal system behaviors when detecting malware on Linux platforms. Users may notice unexplained system slowdowns or crashes, often resulting from resource-heavy malicious processes running in the background. Increased or suspicious network activity can also be a red flag, indicating potential unauthorized data transfers or communication with a command-and-control server.
Another sign is the presence of unknown processes in system task managers, which might indicate malware operating behind the scenes. Unexpected changes to system settings, such as altered configurations or unauthorized software installations, can also point to an infection.
Additionally, frequent system reboots or the appearance of unfamiliar files and directories should raise concerns. Unusual system log entries, which can be reviewed using command-line tools, might also reveal suspicious activities or failed access attempts.
Early malware detection requires prompt identification of these specific signs that indicate an infection.
Preventing Malware on Linux
Upgrade systems and applications to the latest versions to reduce the number of security vulnerabilities that hackers could target. Utilizing reputable antivirus and anti-malware programs tailored for Linux provides another layer of defense. The security tools operate as threat detectors, removing potential threats before they cause damage.
Proper system configuration is vital in addition to using security software. Organizations should establish firewalls to handle internet traffic flow appropriately. Firewalls can block unauthorized access and help control which applications and services can communicate over the network. Implementing intrusion detection systems (IDS) can also be beneficial.
Another key practice is to limit user privileges. Users should only have the access necessary to perform their tasks. Granting administrative rights sparingly can significantly reduce the risk of malware being able to execute harmful operations. Employing the principle of least privilege ensures that the potential damage is limited even if an account is compromised.
People should exercise caution during new software installations. Only download applications from trusted sources and verify their integrity using checksums or digital signatures when available. The practice of legitimate software camouflage by cyber attackers requires users to exercise these security measures, which stop unintentional malicious software installation.
Regular system log monitoring enables organizations to identify suspicious activities that may signal potential security threats. Automated anomaly detection through a log watch system and similar expert log management solutions makes threat identification processes more efficient.
User safety increases when customers receive education about proper computing practices. Teaching user detection of phishing attacks, the avoidance of unreliable links, and the reinforcement of script-execution safety become fundamental anti-malware strategies.
Organizational defense systems excel when proactive techniques unite to lower environmental vulnerability against malware attacks.
Steps to Clean Up Malware
Begin by isolating the infected machine from the network to prevent the spread of malware to other systems. Next, boot into a safe mode or a live environment. This minimizes the chance of malware interfering with the cleanup process.
Using trusted antivirus or anti-malware tools, perform a comprehensive scan to identify and remove the malware. During scanning, you should review the tool results while implementing recommended actions for isolation or removal of potentially harmful content.
If automated tools cannot fully resolve the issue, manual steps may be required. See to it that all suspicious files, processes, and services the scan detects need further investigation. Utilize system commands to kill malicious processes and delete infected files. Checking and removing any unauthorized entries in startup scripts or services might be necessary.
Specialized tools like chkrootkit or rkhunter can detect and eliminate these deeply embedded rootkit threats. Ensure that system configurations are reviewed and reset any changes made by the malware. Check for any additional accounts or privileges that may have been created during the infection and remove them promptly.
After cleaning the system, reboot and run additional scans to eliminate all traces of malware. It’s also advisable to update all passwords and security keys as a precaution against potential credential theft.
See to it that all suspicious files, processes, and services the scan detects need further investigation. Regularly update and patch the system to close any vulnerabilities the malware might have exploited. Reconnect to the network only once you are confident the system is thoroughly cleaned and secure.
Restoring System Integrity
Ensure the system is secure and fully functional after malware removal. Begin by verifying that no unauthorized changes were made to the system configurations.
This includes checking for any unexpected modifications to key system files and directories. If any critical system components were affected, consider reinstalling them to guarantee they are clean and functioning correctly.
Next, a comprehensive review of all user accounts on the system will be conducted. Remove any unauthorized accounts that may have been created during the malware infection and reset passwords for all legitimate users to prevent any potential breaches using stolen credentials. During their review process, organizations need to strengthen access permissions to minimize future attack threats.
Backup data should be reviewed to ensure it is not compromised. Files should be restored from backups made before the infection occurred. This helps ensure that no remnants of the malware are reintroduced to the system.
Assess the system’s security policies while executing necessary updates to these policies. Organizations should implement urgent security updates in access management systems to increase security. Employing a more robust monitoring solution might be beneficial in detecting and responding to suspicious activities swiftly.
Engage in regular security training for all users, emphasizing safe computing practices and awareness of potential threats. Building a security-focused organizational culture will prevent future infections.
It’s also advisable to review and update your incident response plan. Identify the entry points of malware in your system to see where security weaknesses exist. Better security protocols require development according to gathered information to achieve improved defenses during upcoming emergencies.
Proper system restoration combined with maintenance enhancements decreases the possibility of reinfection while creating sustainability for your secure operational base. System identification of vulnerabilities becomes possible through frequent audits and regular updates that enable prompt vulnerability resolution.
Effective planning plus an appropriate strategic plan ensures successful execution of complex website control panel transfers. Transitioning from cPanel to VestaCP has several advantages, such as lower resource consumption and a more user-friendly interface. Through the guide you gain knowledge about the complete migration process for achieving a seamless transition.
Decisions become easier to make through identifying the causes driving people to migrate. VestaCP provides users a light-weight interface containing basic features that appeal to users who want straightforward management solutions. Your website will operate more efficiently since VestaCP needs fewer system resources than the alternative solution.
An essential evaluation factor involves examining your website structure at present. Familiarize yourself with the components and configurations in cPanel that must be transferred.
The backup should contain all your website data files, database, and email accounts. Perpetually protect all custom applications and scripts that power your website operations. Knowing what needs to be migrated will make organizing and executing the process easier.
Your hosting provider must receive constant updates during your server transition process. Your server configuration needs their expertise to become fully functional for VestaCP with the assistance of your hosting provider. Customers gain assistance through hosting providers to address system constraints which affect their data transfer capabilities.
As you proceed with the migration, remember that attention to detail is key. Every step, from exporting data to setting up your new control panel, must be executed carefully to avoid disruptions to your website. With this guide, you’ll have the tools and knowledge to switch from cPanel to VestaCP efficiently.
Preparing for the Migration
The first step toward a successful migration requires backing up all website content, such as databases, files, and emails. A reliable backup allows you to recover your data if anything goes wrong.
Evaluate the compatibility of your current setup with VestaCP. Ensure that your software and scripts are compatible to prevent any functionality issues after the migration. Verify the server requirements for VestaCP and confirm that your server environment is prepared to host it.
Communicate with your hosting provider to understand any specific requirements or constraints that could impact the migration. Through professional agencies people gain essential assistance together with knowledge that supports their professional transition.
Choose a suitable time for your migration to reduce system outages. Choose a period of low traffic to avoid disrupting your users. Ensure you have all necessary credentials and access permissions before beginning the process.
Exporting Data from cPanel
To start the data export process from cPanel, begin with your databases. Access phpMyAdmin within cPanel, locate the database you want to export and use the export function to download it in SQL format.
Connect to your server and navigate to the public_html directory using an FTP client like FileZilla. Download all the necessary files to your local machine. Ensuring that every essential file is copied will prevent future issues.
Don’t forget to export your email accounts. In cPanel, navigate to the Email Accounts section to back up your email data. This step is crucial if you use cPanel’s email services, as you must recreate these accounts in VestaCP.
For any custom scripts or applications, save their configurations and settings. These might include specific files or database tables that are not part of the standard website structure. This data will make the reconfiguration process in VestaCP much smoother.
Attention should be drawn to your DNS settings because you may have set up custom configurations. While you will be updating these later, having a record of your current settings can help ensure a smooth transition.
By methodically exporting each component, you set the stage for a successful migration to VestaCP.
Setting Up VestaCP
Once your data is safely backed up, set up VestaCP on your server. First, download the VestaCP installation script from the official VestaCP website. Connect to your server using SSH and execute the script following the on-screen instructions. The installation will prompt you to enter essential details such as the admin email and password, so keep this information handy.
After the installation, access the VestaCP interface by navigating to your server’s IP address, followed by port 8083 in your web browser (e.g., http://your-server-ip:8083). Log in with the credentials you set during the installation.
Begin by configuring the basic settings to suit your needs. Create new user accounts as necessary and set up your domains. VestaCP provides a straightforward interface for adding domains; go to the “Web” section and click “Add Domain.” Fill in the required information, and VestaCP will automatically handle the setup.
Navigate to the “Mail” section and add your email domains and individual accounts. Ensure each email address is correctly set up to match those you exported from cPanel.
The data import process requires you to familiarize yourself with all VestaCP features, especially the file manager and database management tools. Familiarizing yourself with the interface will make subsequent steps smoother and more efficient.
You should set up the essential security protocols available in VestaCP. VestaCP’s firewall management modules, together with available security features, defend your server from unauthorized access. Your server security requires activating all available security features.
You’re ready to import your data once you’ve completed the initial setup and configurations.
Importing Data to VestaCP
Begin by using VestaCP’s file manager to upload the website files you previously downloaded. Ensure the files are organized in the correct directory structure to maintain your site’s functionality. Create a new database in VestaCP’s phpMyAdmin for database imports and import your SQL file. Verify that all tables and data have been imported correctly to prevent functionality issues.
For email accounts, go to the “Mail” section in VestaCP and recreate the email accounts you exported from cPanel. Ensure each account is set up accurately, including any forwarders and filters. If you have custom scripts or applications, upload their configurations and settings files to their respective directories.
Review the DNS settings that were previously noted and replicate them in VestaCP. The yearly process of generating new records stops domain setting inconsistencies, which reduces misconfiguration occurrences.
Check the permissions of your uploaded files and directories to ensure they match the settings from your cPanel setup. Websites with inadequate permissions face problems with user access that affect operational functionality.
Use the VestaCP interface to set up needed site services and configurations, including cron jobs and SSL certificates. This procedure allows you to construct a VestaCP foundation for testing purposes that meets operational requirements.
Testing and Troubleshooting
During the testing phase, verify that your website’s content displays correctly by navigating each page. Ensure that all internal and external links function as intended. Evaluate the performance of forms, scripts, and interactive features to confirm their operation.
The regular experience involves problems that combine faulty references and absent documents. Perform a data cross-reference when backup problems occur to find lost or damaged files so you can fix them. Ensure the file permissions and settings match your original setup to avoid access problems.
Send test emails to confirm that they are delivered and received correctly. Validate that email forwarders and filters are working as expected.
Monitor server logs for error messages or unusual activity that could indicate problems. Address any issues promptly to ensure your site remains stable and functional. Continuing problems need assistance from your hosting provider.
Assessing your entire website through meticulous testing enables you to fix any problems, resulting in a seamless VestaCP migration.
Finalizing the Migration
Once your site functions properly after testing, it’s time to finalize the migration. Update your DNS settings to point your domain to the new server’s IP address. With this modification, the website ensures all users get directed to its VestaCP-hosted domain.
Monitor your site closely for any unusual behavior as the DNS updates propagate. Check performance metrics and server logs to identify any issues early. Address any problems promptly to maintain a seamless user experience.
The migration process requires users to receive an announcement notification. This notification should notify them of potential downtimes and any new features or changes they might encounter. When information presents itself clearly, users achieve better control over their expectations, thus lowering their confusion.
In the days following the migration, monitor site performance and user feedback closely. Make all necessary changes now to guarantee optimal performance. The hosting provider is a dependable resource that can provide assistance and guidance at any moment.
Your effort to continuously monitor your site and quickly resolve your issues will help your VestaCP installation progress smoothly so you can take advantage of the new control panel.
Strong security measures on your Linux server become increasingly vital because cyber threats persist and evolve. The open-source Linux Malware Detect (Maldet) is an effective solution for server administrators to protect their systems. Users widely choose the open-source Linux Malware Detect tool (Maldet) because it works well with Linux and cPanel server environments.
Installation Process
Installing Maldet on your server involves a few simple steps. Visit the official repository to get maldetect using wget command: ‘http://www.rfxn.com/downloads/maldetect-current.tar.gz’ and follow it with ‘./install.sh’ command to initiate setup.
When installing, you may encounter two typical problems: permission errors and missing dependency requirements. To avoid these, ensure you have root or sudo access before proceeding. If you encounter dependency problems, updating your package manager and installing required libraries can resolve them. Official documents that show if updates need attention improve research effectiveness.
Once Maldet is installed, verify the installation by running `maldet –version` to ensure it’s correctly set up. This command should return the current version number of Maldet, confirming that the installation was successful.
After installation, consider updating Maldet’s signatures by executing `maldet -u` to ensure you are protected against the latest threats. You may also want to run an initial scan to check for any existing malware on your server using `maldet -a /path/to/directory.`
This procedure enables users to establish Maldet on their server to exploit its advanced malware detection capabilities.
Key Features of Maldet
Maldet’s malware detection capabilities are enhanced through multiple features. Real-time monitoring is a defining characteristic that lets Maldet always watch your server for irregular activities. The continued server monitoring through real-time surveillance enables quick detection and resolution of potential risks before any harmful events happen.
Maldet is a valuable security tool that helps users detect threats automatically. It equips users with automated scheduling options that enable server malware checks at programmed intervals. Regular automated scanning through Maldet protects your system from security threats that continue to appear between manual checks.
Maldet watches system operations and automatically reports security issues. The tool warns you through emails when malware emerges so you can take action before the issue becomes more significant. Maldet makes it easy for security experts to read reports about all detected threats and what the software did to stop them.
A critical functional aspect of the software enables automatic file isolation to prevent virus demonstrations. Through its isolation feature, Maldet defends your server environment against threats by discontinuing malware spread across your server network. The integrated quarantine function operates optimally with Maldet’s real-time activity monitoring and automated scanning capabilities to deliver complete security protection.
Maldet maintains resource-efficient operations as its final design feature. Our tool does not affect server performance, yet it perfectly handles limited system resources. Maldet runs efficiently, so organizations receive solid protection that does not burden their system operation.
Newsletter notifications protect Linux/cPanel server resources through automatic system enhancement, minimal resource utilization, and complete monitoring capabilities.
Configuring Maldet for Optimal Performance
Removing inefficiencies in Maldet’s operation requires adjusting its settings to achieve peak operational efficiency. Start editing the configuration file at `/usr/local/maldetect/conf.maldet`. This file lets you modify settings to boost your server control functions.
First, create custom scan schedules to ensure your server is regularly checked for malware. Activity patterns can control the frequency and scope of server auditing runs. Additionally, specifying directories to include or exclude from scans can focus Maldet’s efforts where they are needed most, optimizing the detection process.
Email alerts should be enabled to stay notified about detected threats. Setting up these alerts within the configuration file lets you get instant alerts to respond quickly. The proactive alert system helps ensure security needs and prevents damage to our operations.
You can also set up Maldet to quarantine infected files automatically. The configuration file requires setup to activate this isolating feature that separates risky files to block malware from spreading across your system. System protection needs this principle because it helps stop risks better.
Maldet lets you use multiple security tools together after special setup steps. When Maldet operates with additional security tools, it enhances your complete security structure while building a robust defence plan. Maldet works well with other security systems because its design follows no set requirements for integration.
Check and upgrade your security configurations regularly to defend against fresh threats and changes in your server system. Regularly updating Maldet settings lets you use its top-level protection features properly. Adjusting its advanced settings can improve your server’s security and enhance Maldet’s performance.
Benefits of Using Maldet
Deploying Maldet, due to its security contribution, can benefit your server. The most valuable feature is that it lets you find and remove malware while defending your data against cyber threats. Maldet also adds new security functions to existing systems without needing extensive system changes.
To benefit from an active developer community, Maldet operates as an open-source tool that receives constant improvements from contributors and users. The interactive contributions of developers and users keep Maldet a dependable security tool that handles present and emerging cyber threats.
The way Maldet functions helps it use server resources without wasting power. Due to its efficiency, Maldet avoids slowing down server performance; hence, it remains ideal for systems with restricted resources. Your server’s proper functioning defends against threats while maintaining high performance and operational performance.
Maldet makes system security easier through its automatic scanning function. Maldet enables automatic server malware checks through scheduled scanning features, which do not need constant human supervision. The automated features of Maldet reduce total working time by guaranteeing continued security over extended periods.
The Maldet system sends organized threat reports that allow operators to deal with threats quickly. Maldet’s security features immediately respond to possible issues, strengthening server protection. Automated malware file quarantining by Maldet stops the propagation of harmful software, thus providing dual layers of protection.
Server administrators should recognize Maldet as a beneficial tool that helps improve server security measures.
Comparing Maldet with Other Security Tools
Maldet positions itself uniquely compared to other security tools through its dedicated target of Linux and cPanel platform detection. Maldet focuses on delivering top Linux and cPanel protection because its tools are designed to run effectively on these platforms. The Maldet system uses its special creation to discover and protect against security threats that primarily target Linux web servers.
Maldet functions with the best possible resource usage, which makes it highly valuable. However, server performance and system resource consumption are negatively affected because many tools for malware detection demand significant processing capabilities. Due to its light burden on your server, Maldet runs well in performance-sensitive system environments.
Thanks to its real-time monitoring feature, Maldet stays in full security mode. This capability distinguishes it from other security tools because the system automatically detects and removes threats during active operation.
Since Maldet is an open-source program, its development process becomes more transparent for the community. This means that users benefit from continuous updates and improvements a global community contributes, which is not always valid with proprietary software.
With automatic scanning and detailed reporting, Maldet provides better convenience options than any other security tool available. It eases server administration by automatically watching for threats and creating thorough reports so managers can focus on other important tasks.
Conclusion
Implementing Maldet within your server defence structure creates an advanced system to counter emerging threats in cyberspace. Through automatic monitoring and scanning, Maldet eases regular manual workloads, allowing IT staff to address high-priority tasks. Maldet’s reporting tools and alert system can immediately find threats to lower the chance of system damage.
Maldet runs with low resource needs while providing top-tier security measures. Since it stays open-source, it receives regular security updates that ensure it defends against new threats. Acquiring Maldet for your Linux/cPanel server improves your security readiness and enables trustworthy malware protection.